...
- Open the Tables window.
- In the Tables tab, right-click and select Insert. The application displays a dialog box.
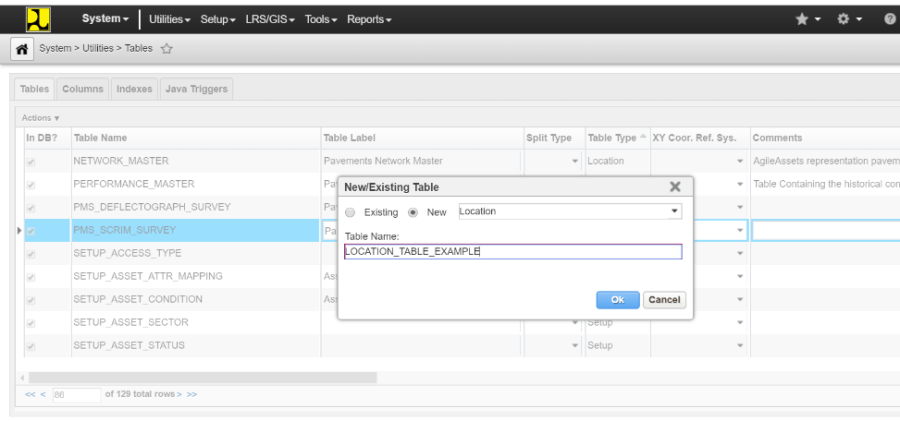
- For the purposes of this example, assume that the table does not yet exist in the database. Therefore, in the Insert dialog box, click the radio button beside New.
- Click the arrow for the drop-down list and select Location.
- Enter the internal name of the new table in the text field in the lower part of the dialog box.
- Click OK. The application closes the dialog box and adds a new record to the table. (The table is not actually created in the database at this point.)
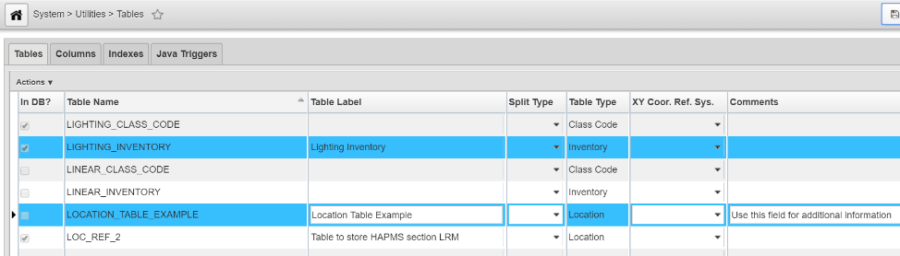
- In the new record, enter the name of the new table in the Table Label column and, optionally, any additional information in the Comments column.
- Click the Columns tab. This tab shows the default columns for any table (comments, user ID, and user update date).
- Right-click the table in the Columns tab and then select the appropriate command: either Add New Column if the column does not exist in the database or Add Existing Column if the column does exist.
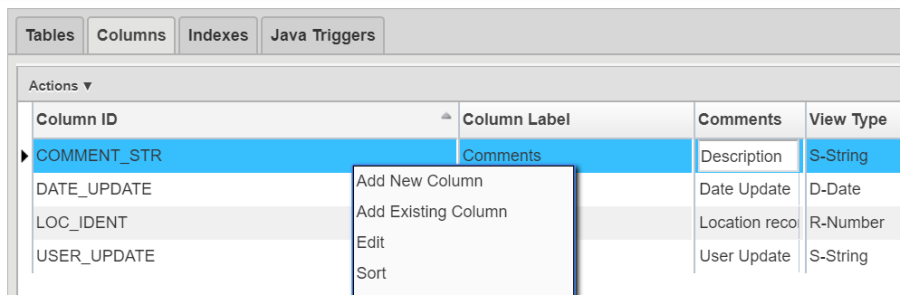
- Repeat step 9 for each column.
- If desired, click the Index tab and create an index for the table. See How to Create an Index for a the Table for more information.
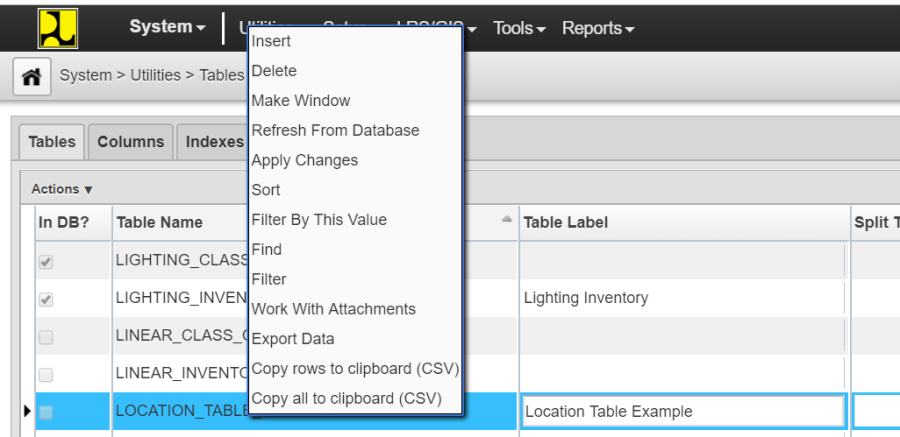
- Select the Tables tab.
- Right-click the record for the new table and select Apply Changes. The application now creates the table in the database with the columns specified in the Columns tab.
- Click the
icon.
The table is now created. Next you will need to create the window for the display of data from the table. Three general types of windows may be created: one that displays data in a tabular format (See Make a Data or List Window); one that displays data graphically along a route, provided location information is in the database table (see Make a Graph Along-the-Route Window); and a pop-up window that is launched by hyperlinks in a column (see How to Make a Popup Window).