...
The out-of-the-box Pavement Analyst Express has included the basic tables and windows for these 3 datasets. As part of the configuration process, the datasets will be expanded to fit the agency’s needs, and import routines will be setup to update these datasets on a regular basis.
If customer has data other than the above-mentioned datasets defined the configuration process, additional datasets will be created and configured in a similar method to Roadway Inventory or Pavement Condition data. Follow the data import process defined by the configuration to update data.
Roadway Segment
Roadway Inventory is for storing various roadway characteristics and their locations, such as Functional Class, Number of Lanes, Lane Width, Shoulder Width, etc. Out of the box, the table is named PMSX_SEGMENT, and the corresponding window is located under Pavement Analyst Express > Asset Inventory > Roadway Segment menu. For detailed process of navigating in this window, follow this link.
Because Pavement Analyst Express does not use LRS, Roadway Segment data is a general dataset (see detailed discussion in AgileAssets System Foundation Configuration Guide, or this link on docs.agileassets.com) that features all the segments in the network..
The Roadway Segment Import Configuration will include an import routine that allows the user to update the data on a regular basis. To execute the import routine, follow these steps. For more information about Import configuration in the system, see Load Data into Tables.
- Select Pavement Analyst Express in the module menu
- Click Setup
- Click Data Import
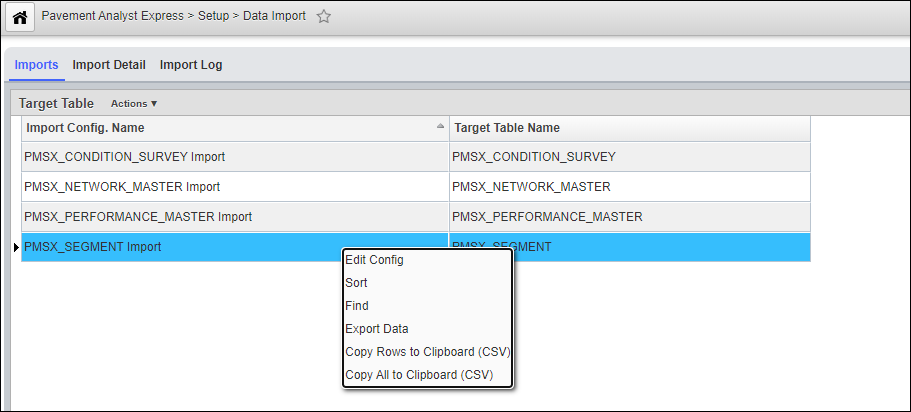
- Right-click the PMSX_SEGMENT Import
- Select Edit Config
- In the pop-up window, use Edit Files button to upload the shape file that matches the data structure from Roadway Segment Import Configuration
- Click Select Source to select the file that was just uploaded
- Click Import to run the import.
- When the import has finished, click the Import Log tab to view the results
Pavement Condition
Pavement Condition is for storing the annual pavement condition survey results. Out of the box, the table is named PMSX_CONDITION_SURVEY, and the corresponding window is located under Pavement Analyst Express > Asset Performance > Pavement Condition Survey menu. For detailed process of navigating in this window, follow this link.
Out of the box, system can store all the pavement distress defined in ASTM D6433-18: Standard Practice for Roads and Parking Lots Pavement Condition Index Surveys standard, and then calculate Pavement Condition Index (PCI) based on the distress. Alternatively, if the PCI has already been calculated prior to import, the system can import them directly as well.
The Pavement Condition Data Configuration will include an import routine that allows the user to update the data on a regular basis. To execute the import routine, follow these steps. For more information about Import configuration in the system, see Load Data into Tables.
- Select Pavement Analyst Express in the module menu
- Click Setup
- Click Data Import
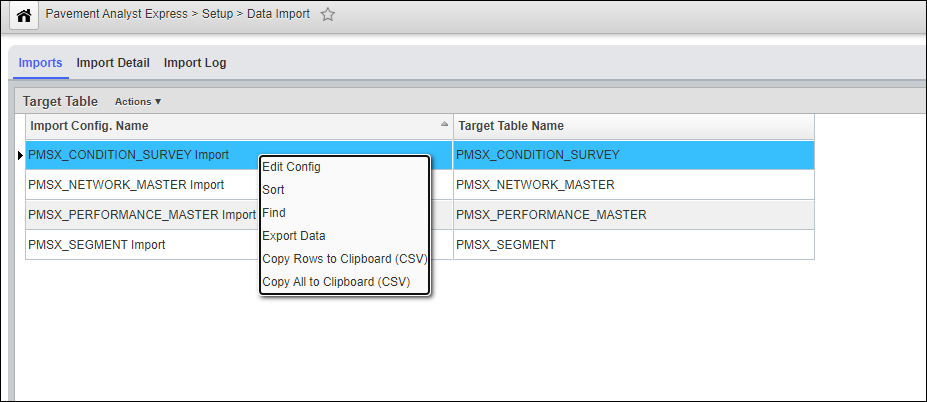
- Right-click the PMSX_CONDITION_SURVEY Import, and select Edit Config.
- In the pop-up window, use Edit Files button to upload the file that matches the data structure from Pavement Condition Data Configuration.
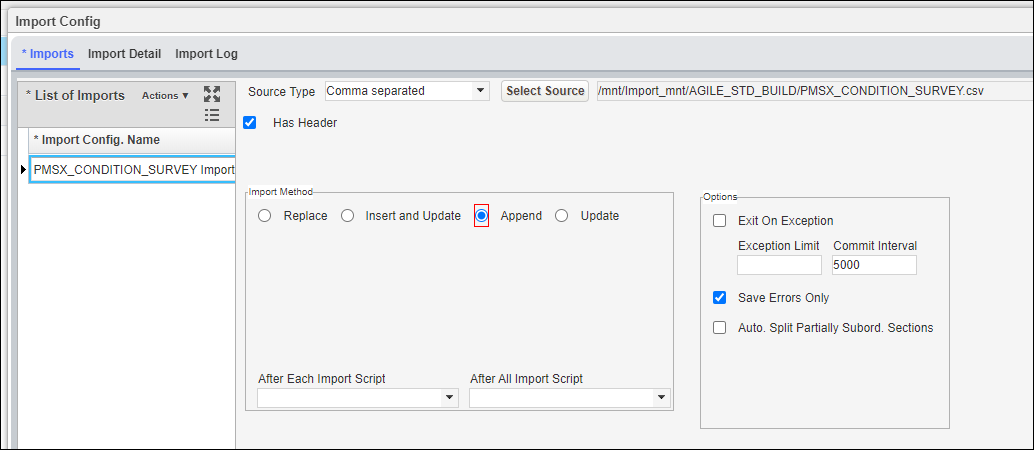
- Click Select Source button to select the file that was just uploaded.
- Iif you haven't imported the new condition data yet, select Append radio button under Import Method:
If you have already imported this year's condition data and want to re-upload a new batch of file it, select Replace radio button under Import Method, and update the Replace Where Clause: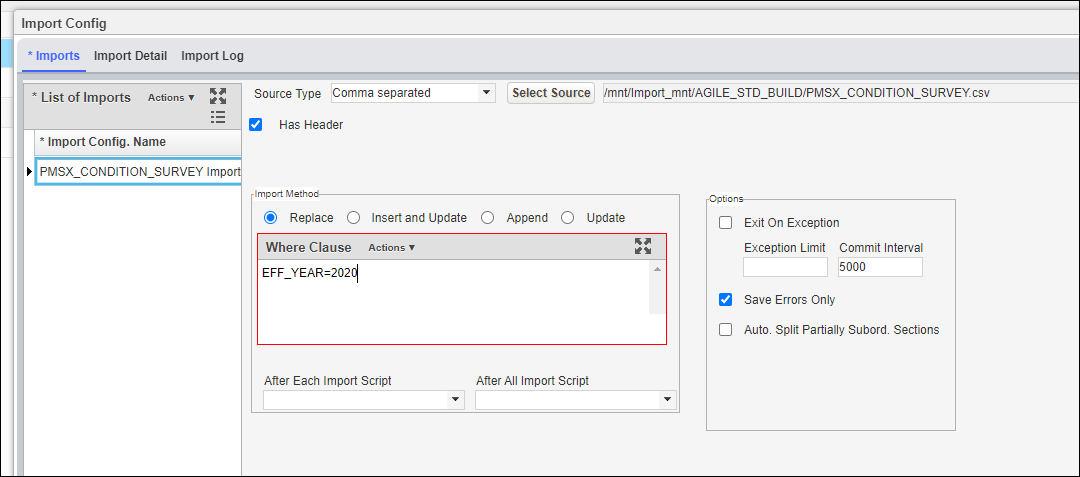
- Click Import button to run the import.
- When the import has finished, click the Import Log tab to view the results.
Calculate PCI
If the PCI has been calculated prior to import, then executing the import above will populate the table with the PCI value.
If the PCI has not been calculated prior to import, then follow these steps after executing the data import:
- Select Pavement Analyst Express in the module menu
- Click Asset Performance
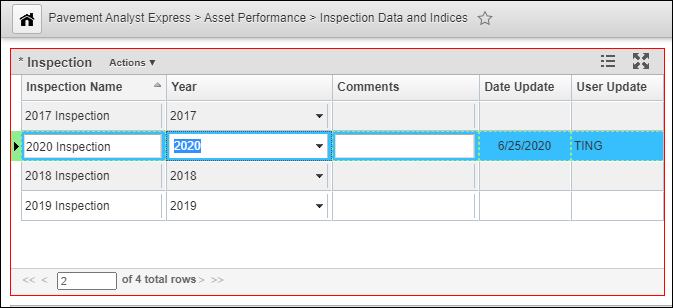
- Click Inspection Data and Indices
- In the top left pane (Inspection pane), insert a new inspection and fill in the Year that matches to the data year in the imported condition data. Then click Save.
- Select System from the module menu. Click Tools and select System Job and then Schedules, select Pavement Analyst Express: Build Inspection Table from Condition Survey system job. In the right pane, right-click the Calculate Pavement Inspection Table based on Condition Survey results executable, and select Define Argument. In the pop-up window, select the Inspection that was just created. Click OK.

- Right click the Pavement Analyst Express: Build Inspection Table from Condition Survey system job, and select Rub Job. Wait for the job to finish.
- Next, select Pavement Analyst Express: Calculate Pavement Condition Index (PCI) in Inspection Table system job. In the right pane, right-click the Calculate Pavement Condition Index (PCI) from Inspection Data executable, and select Define Argument. In the pop-up window, select the Inspection that was just created. Click OK.
- Right click the Pavement Analyst Express: Calculate Pavement Condition Index (PCI) in Inspection Table system job, and select Rub Job. Wait for the job to finish. The Pavement Condition Index (PCI) column in Pavement Condition Survey window is now calculated.
Pavement Structure (Construction History)
Pavement Structure (Construction History) is for storing the completed construction projects, their linear locations and material layer information of each construction location. Unlike other dataset, there are 4 system tables used for this function out of the box, and the corresponding window can be navigated to by following the steps below:
- Select Pavement Analyst Express in the module menu
- Click Asset Inventory
- Click Construction
...