Constraints are used in the Optimization Analysis and Maintenance Analysis windows. Constraint Subdivision allow the user to further subdivide the assets within the problem scope in order to specify more detailed constraints. For example, the user might want to specify different desired condition levels for each the functional class or pavement type. These constraints can be subdivided to allow a more finely tuned optimization. This window contains two panes. The left pane shows the constraints that have partitions. For the constraint selected in the left pane, the right pane shows the hierarchical arrangement of the constraint's partitions
1.1 Create Constraint Sub-Division - Click Here for Constraint Subdivisions Exercises
The objective of this lesson is for the participant to understand how to setup a Constraint Sub-Division. At the end of this lesson, the user should know how to partition a Constraint. |
|---|
In this example, we partition a constraint by performing the following steps:
- Open the Setup Constraint Partitions window: Pavement Analyst > Setup > Network Analysis Setup > Setup Constraint Subdivision
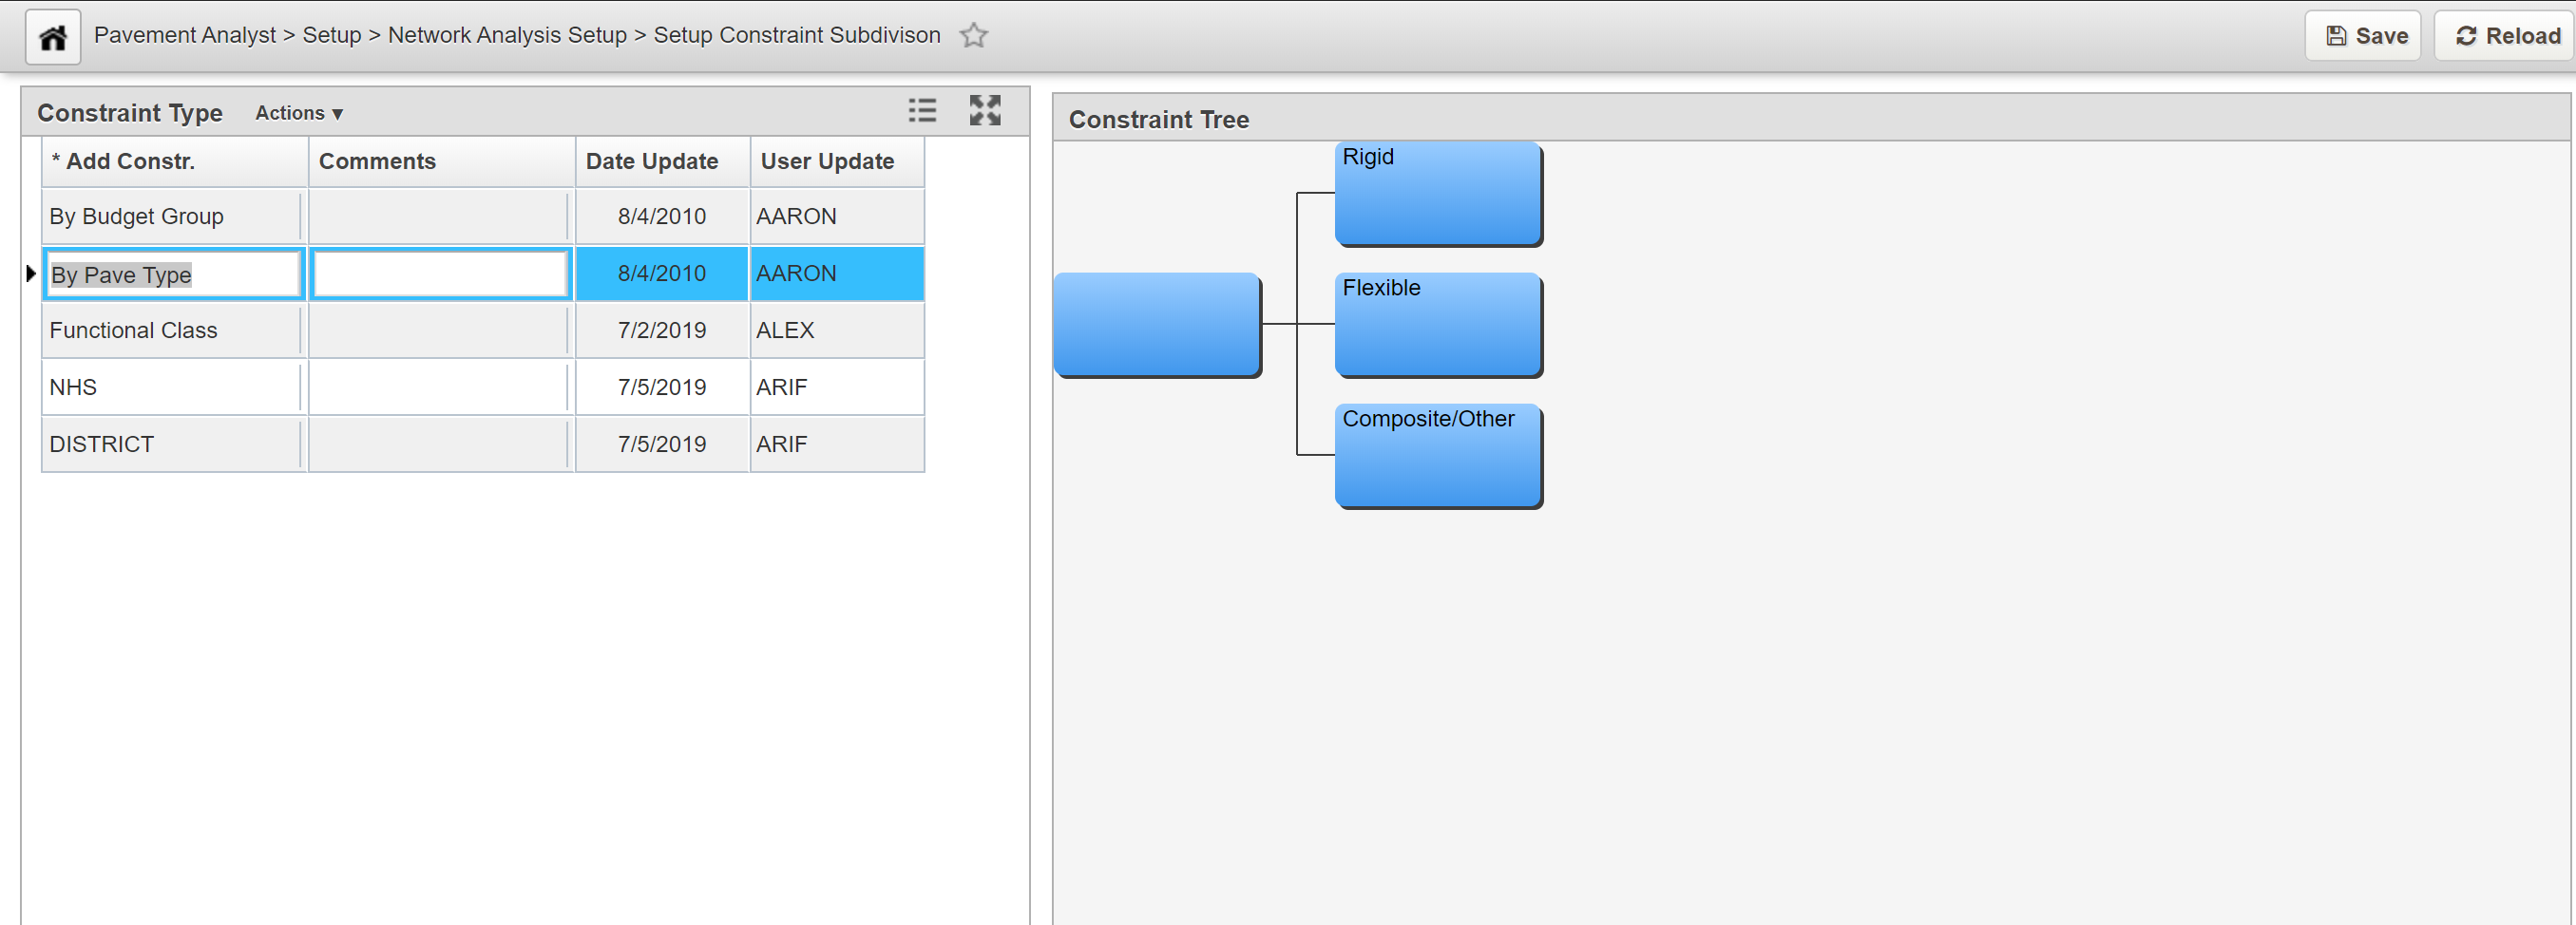
2. In the left pane, right-click and select Insert. A new record is added to the pane.
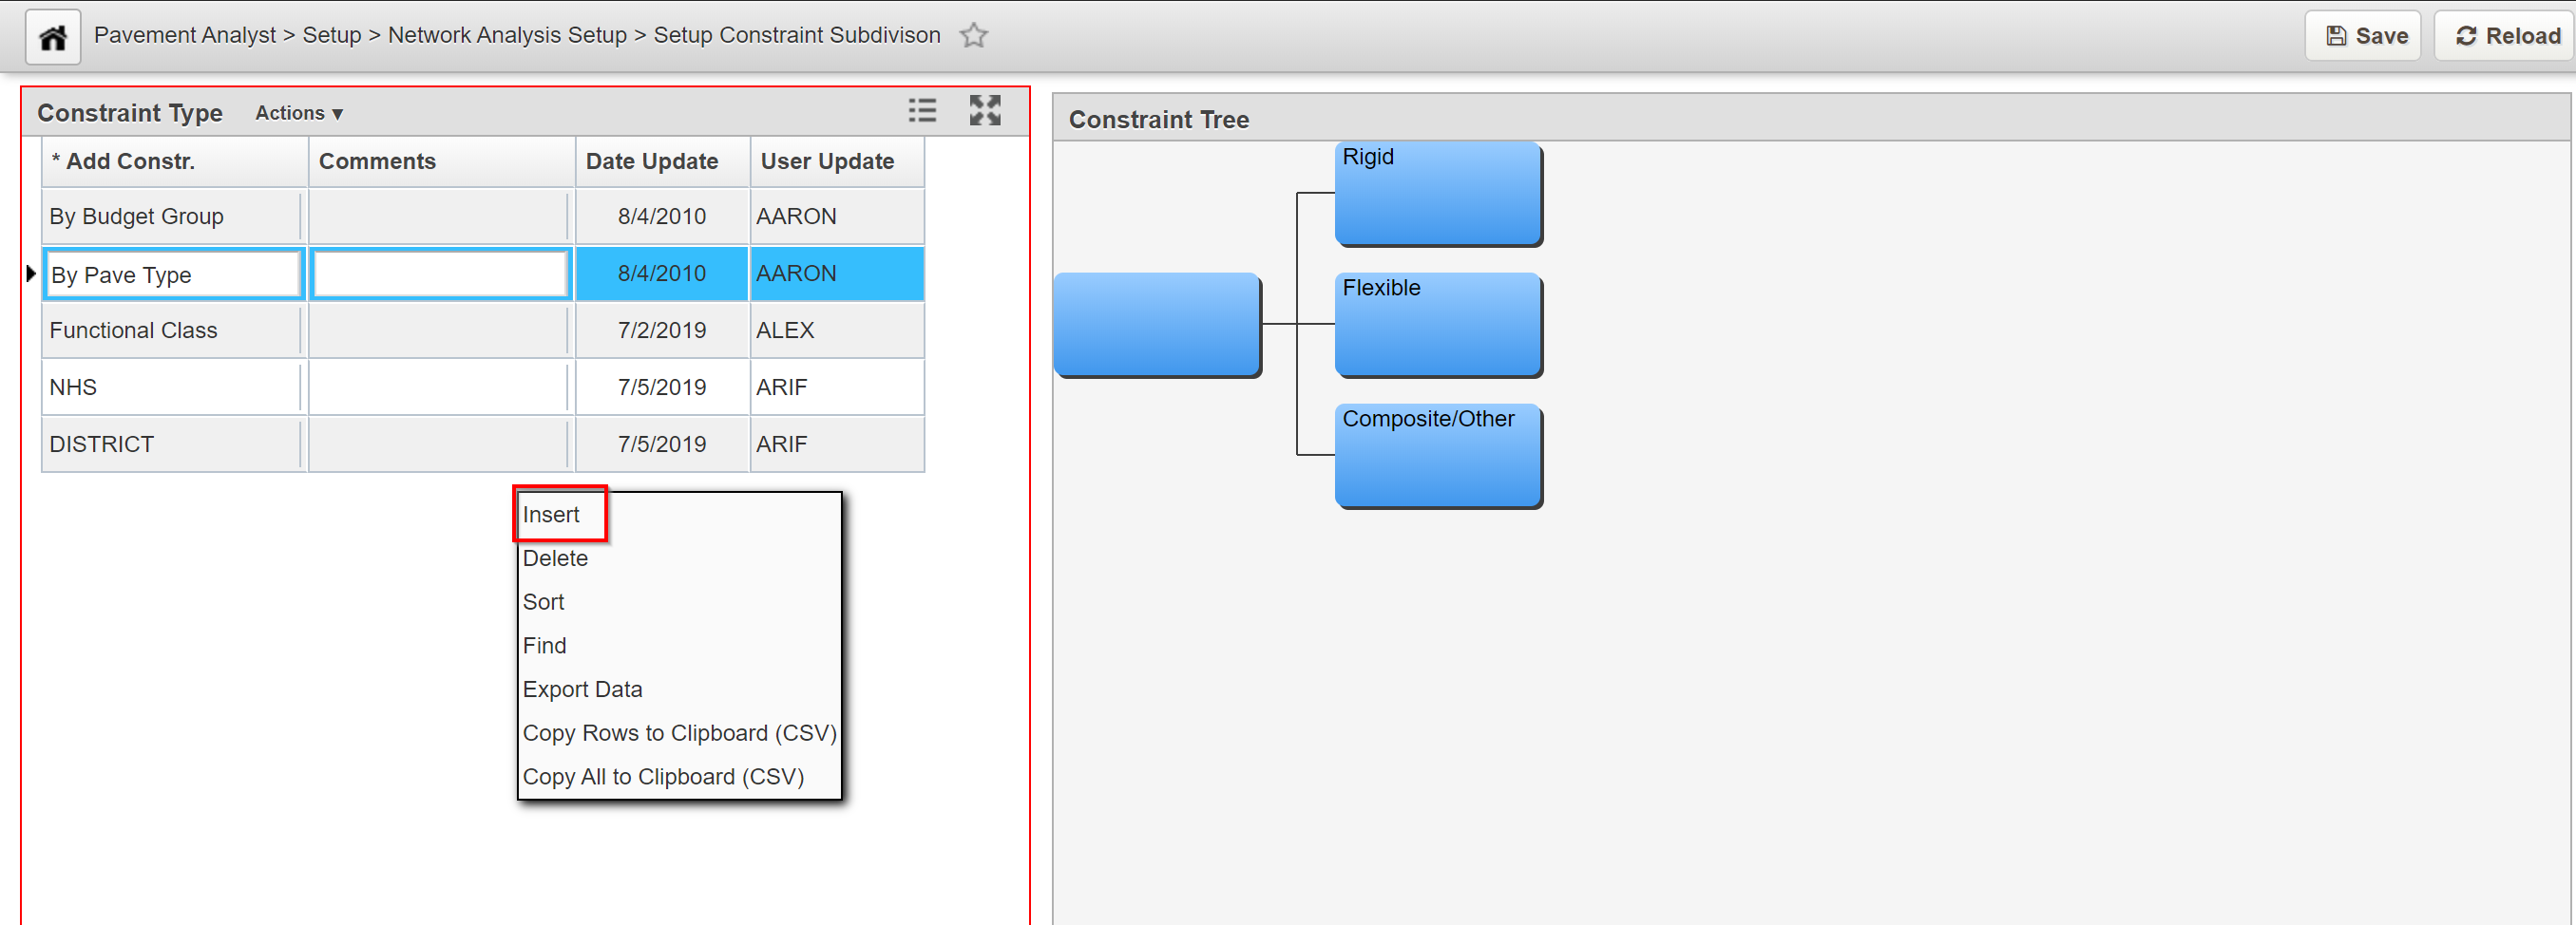
3. In the new record, highlight the default text and then type the column name of the constraint that will be subdivided.
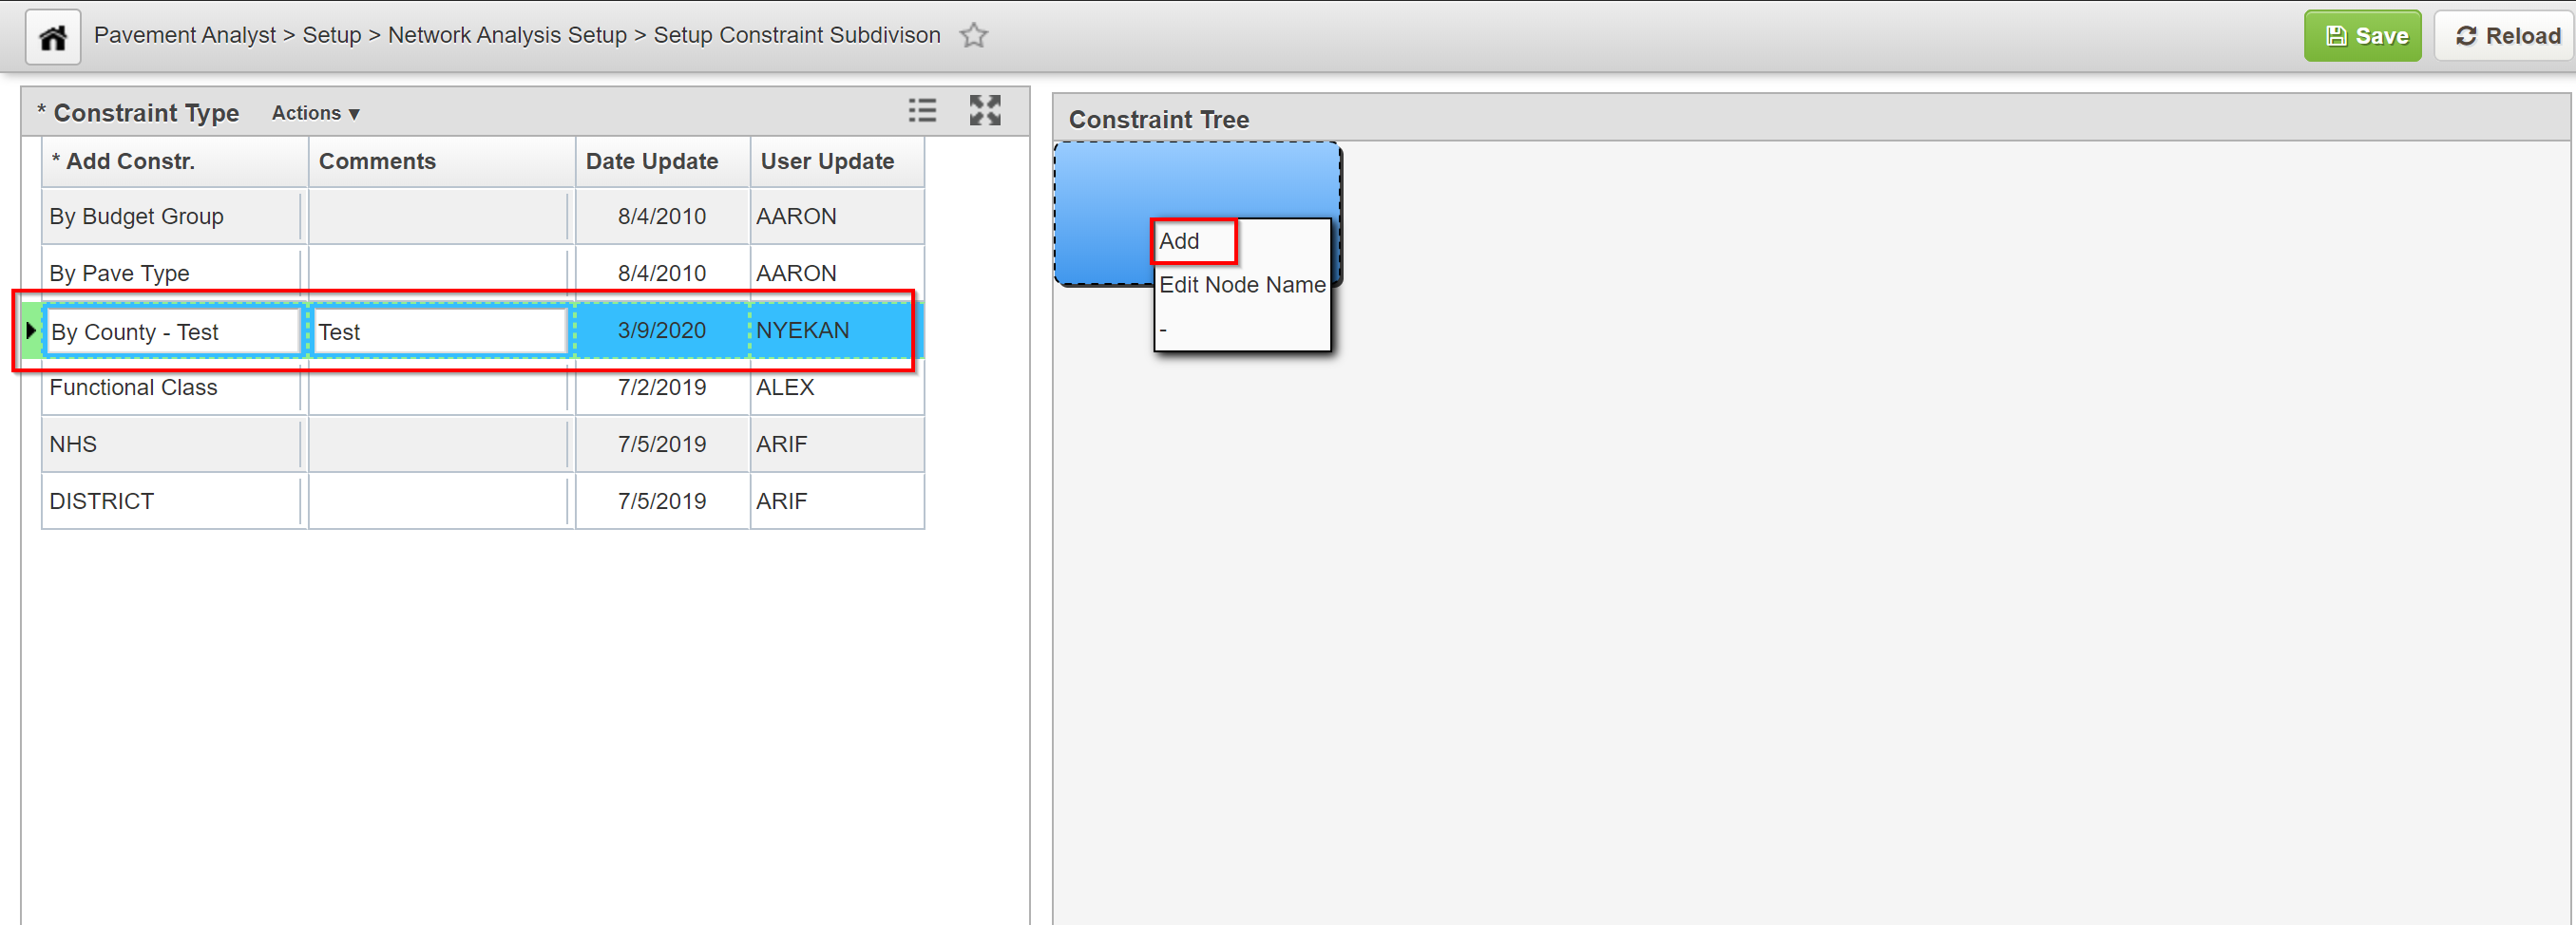
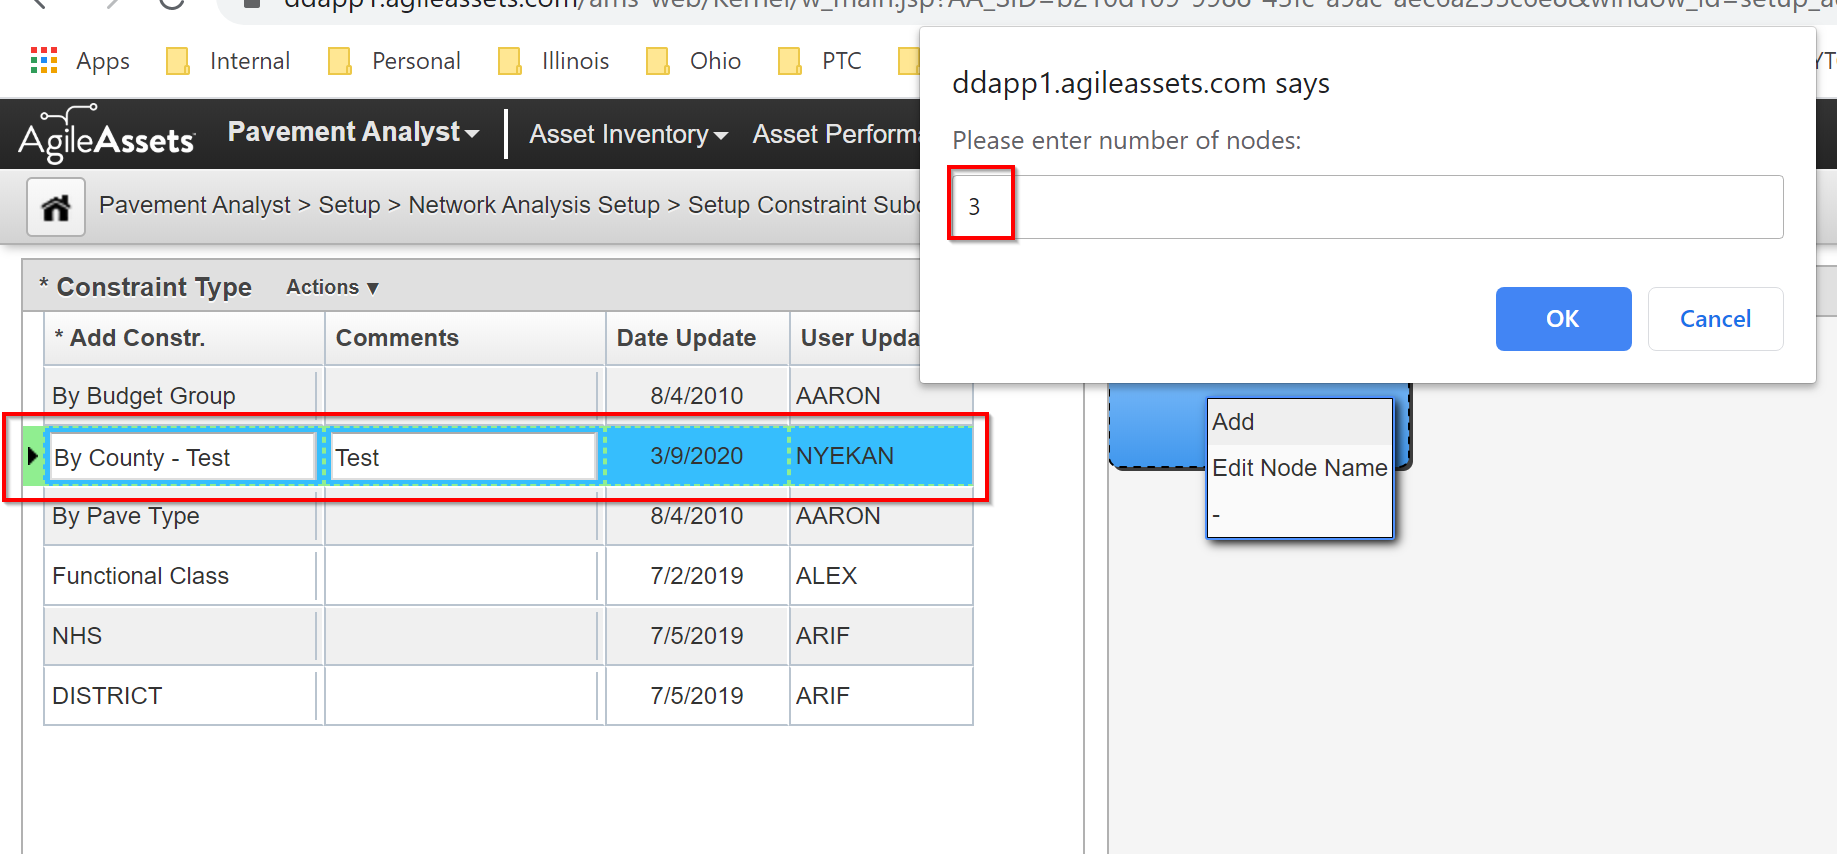
4. In the right pane, right-click the parent node and select Add. The application displays a dialog box so you can enter the number of nodes needed.
5. In the dialog box, enter the number of nodes needed and then click the OK button.
6. Repeat steps 4 and 5 for any additional partitions that are needed.
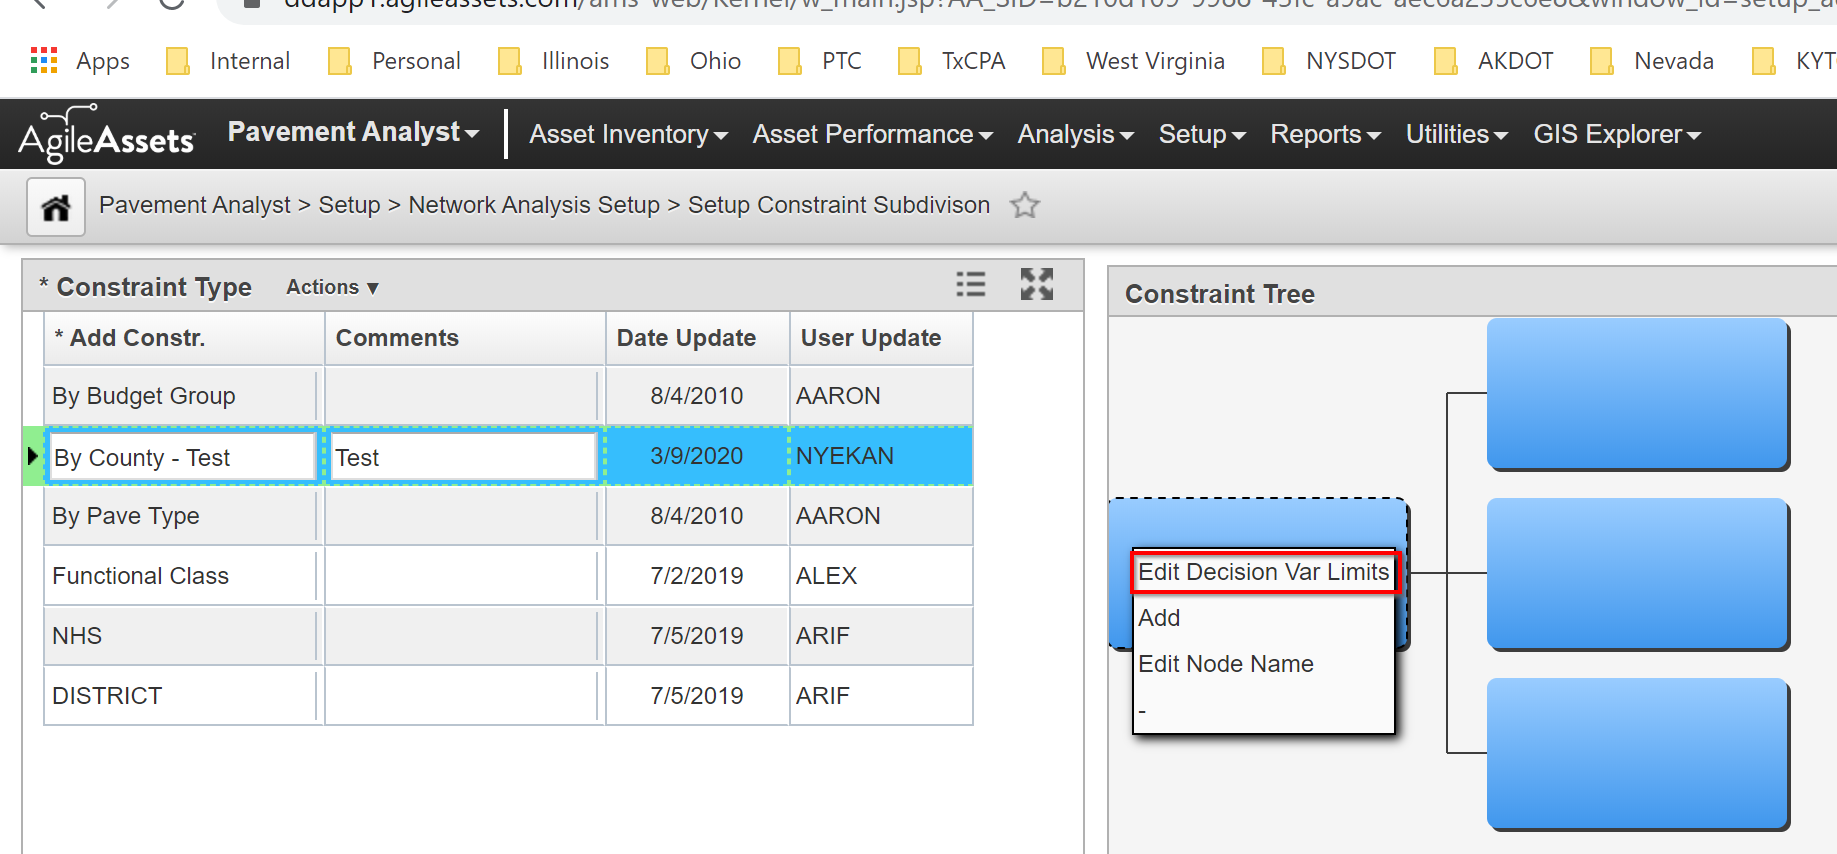
7. Next, right-click the parent node and select Edit Decision Var Limits. The application displays a dialog box so you can select the criteria by which each child node is activated.
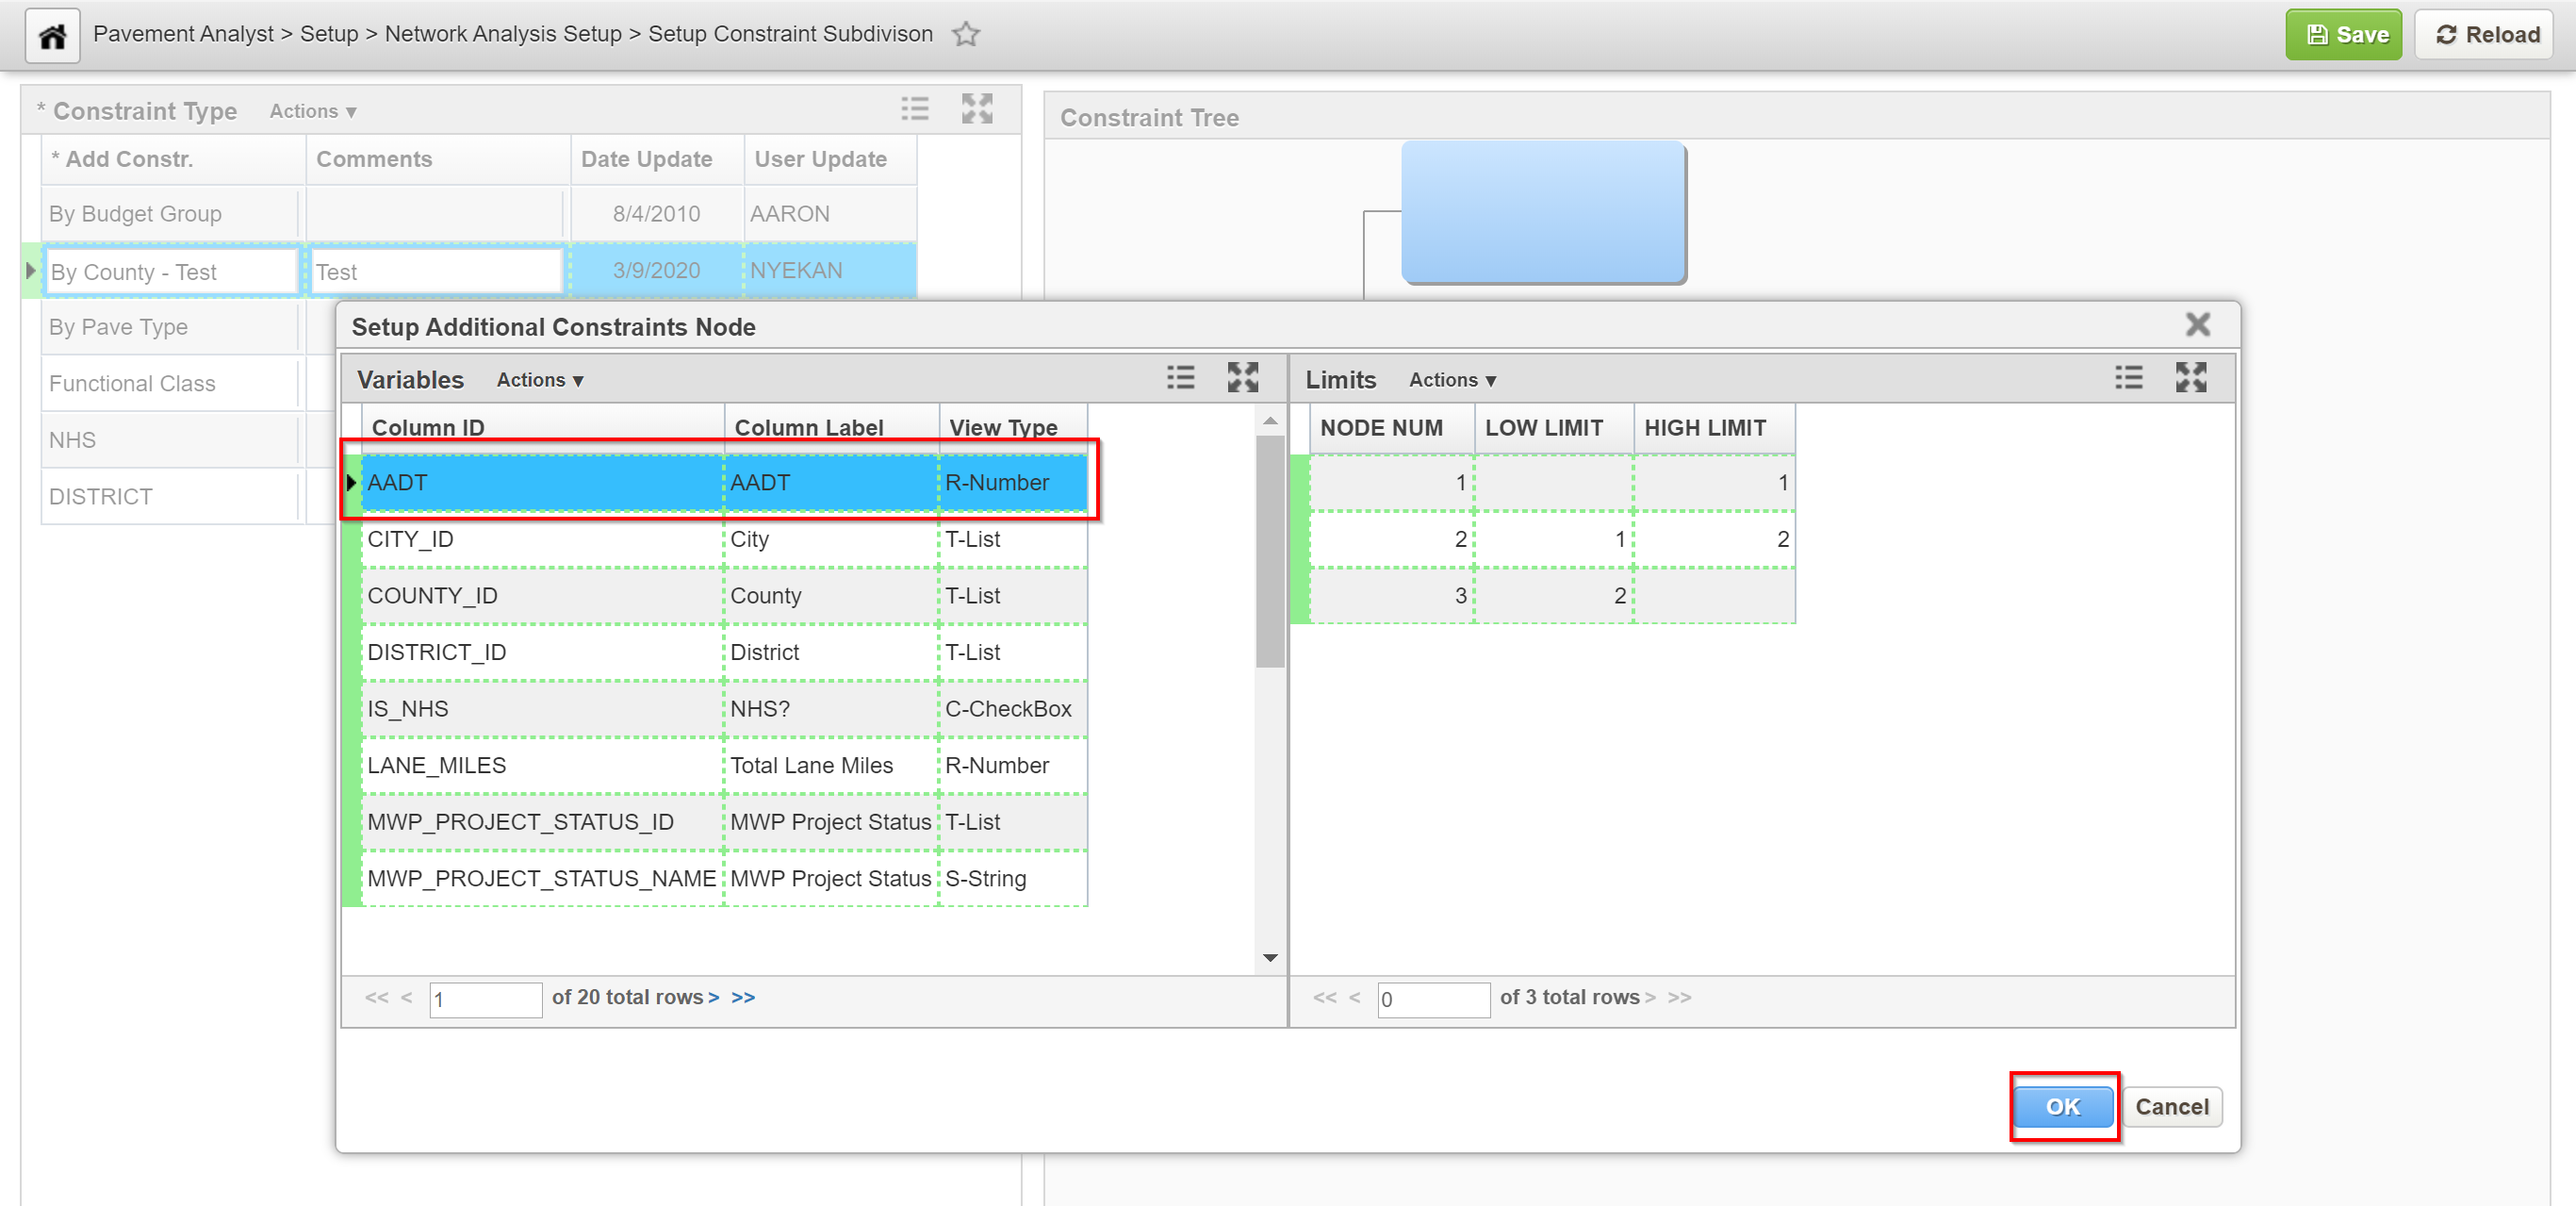
8. In the left pane of the dialog box, select the variable that will be used to determine branching.
9. In the right pane of the dialog box, enter the criteria that will cause the different child nodes to activate.
10. Select OK to close the dialog box. The application labels each of the child nodes with the variable and value that causes the node to activate.
10. If desired, you can further partition one or more of the child nodes by repeating steps 4 through 10.
12. Once the partition hierarchy is as desired, click the Save button to save the new partitions.