How to Add a Layer(s) to GIS Explorer
The GIS Explorer windows has the ability to add layers, display attributes etc.
In order to access and use the GIS Explorer, follow these steps:
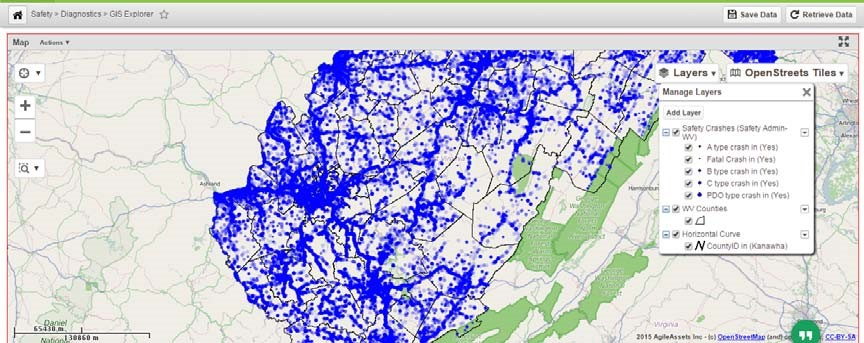
- Navigate to Safety > Diagnostics > GIS Explorer:
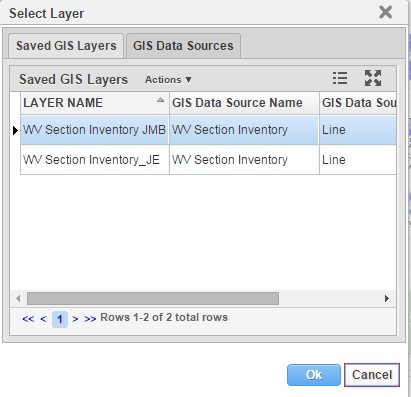
- Select Add layer button. The system displays a pop-up window that includes two tabs. The first tab listed GIS layers that have previously been saved by the user, the second tab displays a list of all layers that are available in the system. Both lists of layers can be added to the map.
Note: 'Saved GIS Layers' lists those map layers that an active user would like to save for future use. In the map explorer window user needs to select a layer from left pane and select 'Save As Layer'. This option will open 'Edit Layer' pop-up window where user can assign a proper name of the layer and the option to make it public. If the Public option is checked the layer will appear in the 'Saved GIS Layers' list for any user. 
- Select the layer that needs to be added and click OK.
- The new layer is added and displayed on the map.
- To add other layers, repeat Step 1-4.
Note: The latest layer added is, by default, displayed on the top; however the order of the layers can be adjusted by clicking on a layer in the left-hand pane and dragging it to the location on this list that you want it to be.