How to Edit Layer Properties
The GIS Explorer windows have the ability to edit layer properties.In order to edit the layer properties, follow these steps:
- Select a layer for which you want to edit the layer properties.
- Right-click and select Edit Layer Properties or expand the dropdown on the side of each layer.

3. A new window, containing four tabs, opens as shown below. Each tab is described below.
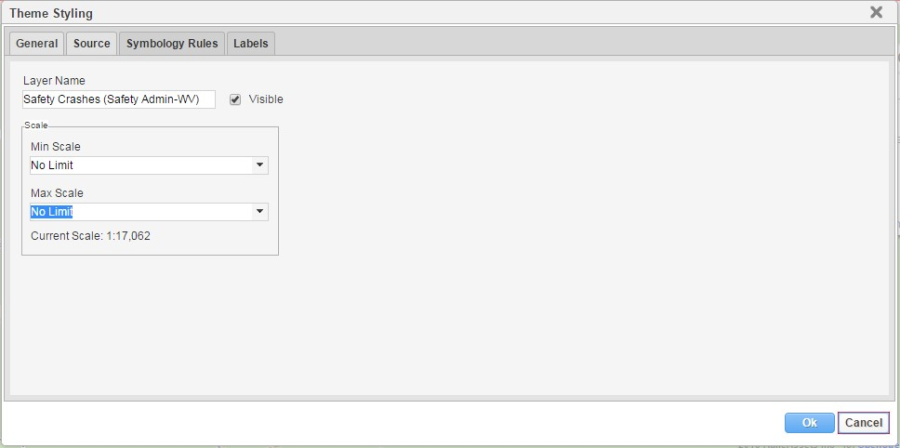
General:
- Layer Name – Allows for customization of the layer name.
- Visible - Checkbox enables user to turn layer on or off.
- Min Scale and Max Scale: Set to "No Limit" by default, the Min and Max scale establishes a range to control the visibility of the layer. The specific layer is displayed within this range and become invisible beyond this range.
- Source: The source of the data is displayed in this tab. The details of the GIS Data Sources are beyond the scope of this tutorial. This tab is non-editable.

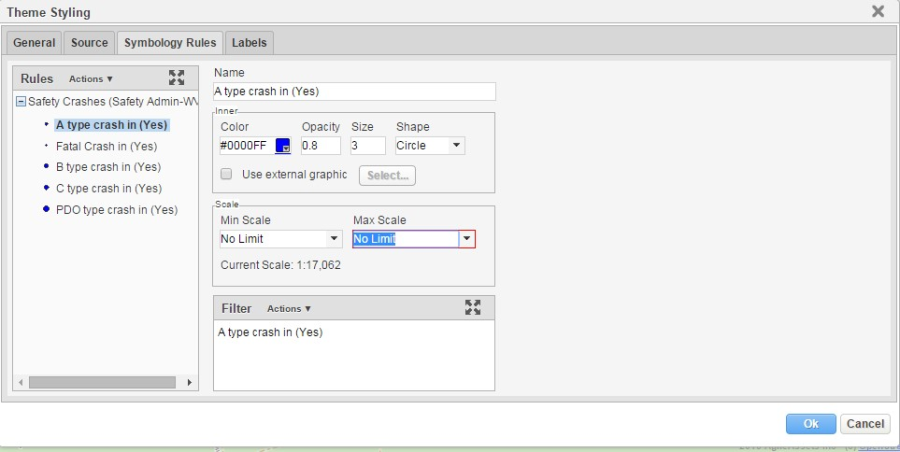
Symbology Rules: This tab is used to define the features of a layer are symbolized. The following is the list of the symbology that can be controlled.
- Color - User can double-click the color and select the color of the symbol.
- Opacity - Opacity is the opposite of transparency: the more opaque the symbol the less transparent it is. The maximum value of Opacity is '1'. This value ranges from 0 to 1.
0.. Opacity is useful when multiple layers are added and overlapped each other. - Size - The size of the symbol to be displayed
- Shape - The user can pick the shape of the symbol from this drop-down. Available options are Circle, Square, Triangle, Cross, and X.
- Use external graphic - User can select any external graphic as a feature symbol. Once checked, a new pop-up window opens and the user can select an external graphic
- Filter - User can filter the data which needs to be displayed on the map. Right-click and select Edit and it will open a pop-up window to select filter scope. The selection is similar to any filter selection in AgileAssets Management System.
Labels: This tab is used to select the field to be used for label (label by), font properties (font name, size and color), scale (upper and lower range of scale within which the label will be visible), label halo effect (check box to activate halo effect, radius and color of halo) and label position etc. 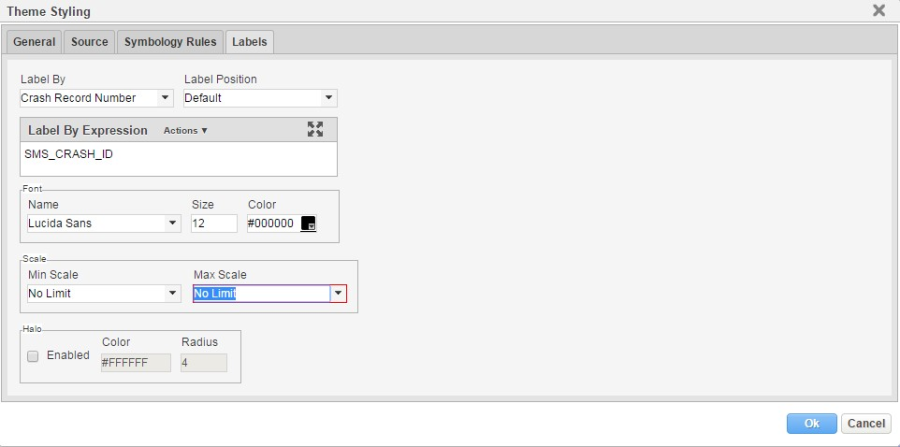
4. Based on the description above, edit the information in the relevant tabs and click OK.
5. The edited layers are displayed on the left and right-pane accordingly.