The system displays the Import Config window when you select the Import Table Data command. This command is found in the shortcut menu that the system displays when you right-click a table record in the Tables tab of the Tables window. The Import Config window contains three tabs: Imports Tab, Import Detail Tab, and Import Log Tab. These tabs are described in more detail in the following sections.
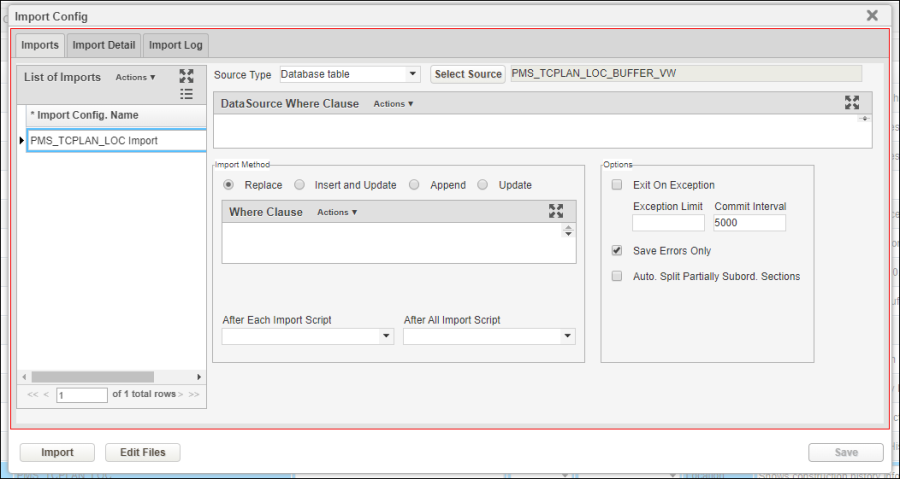
Regardless of the tab that is selected, three command buttons are available. These are described below:
- Close: This command saves any changes you may have made and then closes the Import Config window.
Edit Files: This command button displays a dialog box that shows the available source files for imports. You may select a particular file (by clicking the check box for the file) and then use the right-click Upload File command to move the file from the shared (that is, user accessible) drives to the drive for importing. (To assist you in locating a particular file, you may enter a filter for the file in the File Filter field at the bottom of the dialog box. When you press the Enter key on the keyboard, then only those files matching the filter criteria will be displayed.) If desired, you may move files from the drive for importing to the shared drive by using the Download Selected command.
Note: The system supports multiple root folders. If multiple root folders are configured in the Setup File System window (which is found in the Setup menu of the System module), then the File System field will be shown at the bottom of the File Browser dialog box. This field contains a drop-down list of all available root folders. When you select a folder from the list, the system will refresh the list of files to show those files in that folder.- Import: This command button imports the data from the source table into the target table. The result of the import is shown in the Import Log tab.