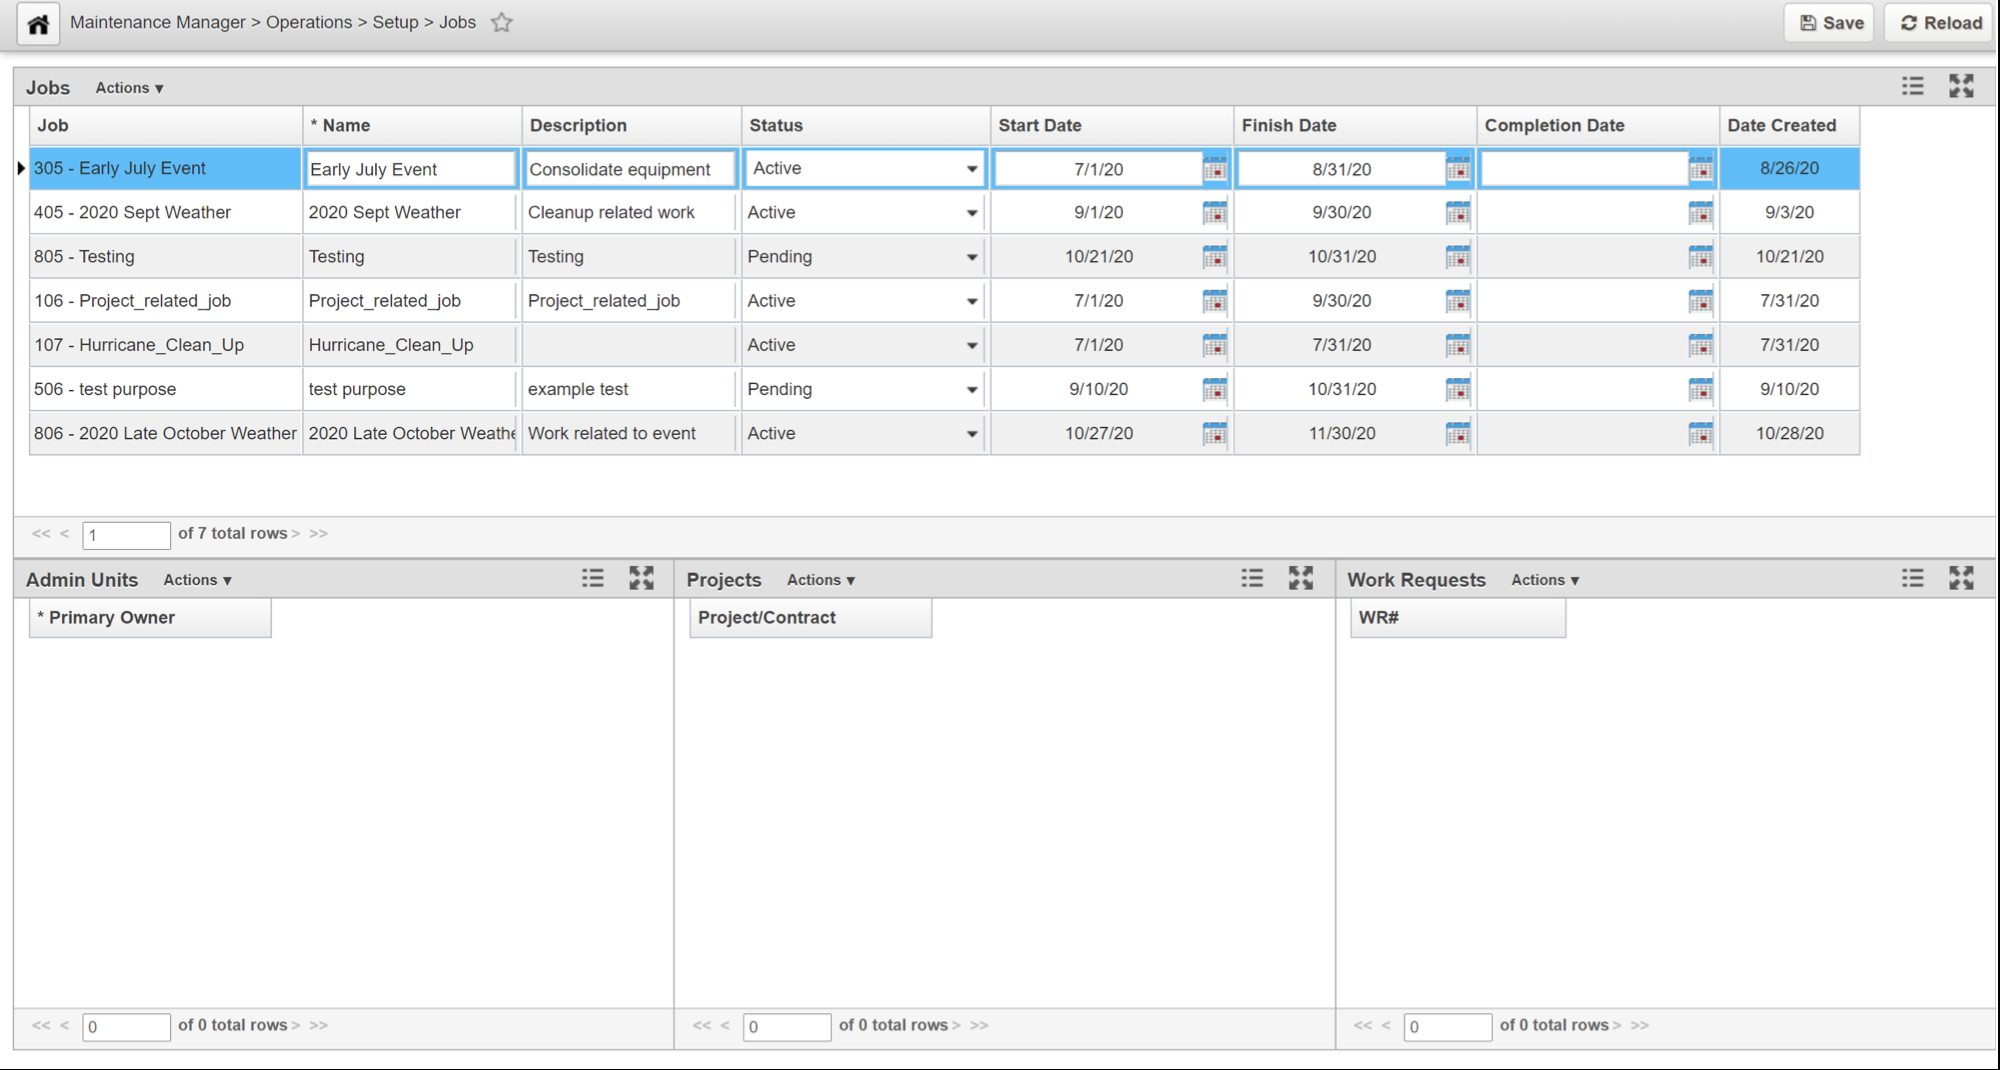
Jobs Window
The Job window is configured to group together multiple projects, work orders, and work requests distributed across multiple Admin Units.
For example: the clean-up activities after a hurricane/storm to capture the state-wide effort.
To open the Jobs window, follow the steps below:
- Navigate to the Maintenance Manager module if you aren't already there
- Select Operations
- Select Setup
- Click Jobs
System Job-related tasks:
Setting Up a Job
Setup a Job in the Jobs window
To setup a job, follow the steps below:
- Navigate to the Jobs window (steps above)
Right-click in the Jobs pane and select Insert or click the Actions drop-down arrow and select Insert
A new record/row is added to the listClick in the Name field and enter the Job name
Click in the Description field and enter a description
Click the Status drop-down and select the applicable status
Click the Start Date calendar icon and choose the appropriate date
Click the End Date calendar icon and choose the date that the Job should expire
Click Save to save the record
Click Reload so that the system refreshes and updates the Job name by including the name in the Name field to be a part of the Job
The newly created Job is highlighted in the table, right-click in the Admin Units pane and select Insert or click the Actions drop-down arrow and select Insert to add additional records. A new record/row is added.
It is also possible to insert multiple Admin Units, Projects, and Work Requests as needed.Click the Primary Owner drop-down and choose the correct Admin Unit
Note: If there are no Admin Units assigned to a Job, then the Job will be available for all work orders and all Admin Units.
Right-click in the Projects pane and select Insert or click the Actions drop-down arrow and select Insert
A new record/row is addedClick the Project/Contract drop-down and choose the applicable project
As needed, right-click in the Work Request pane and select Insert or click the Actions drop-down arrow and select Insert to add additional records
A new record/row is addedNote: This pane does not have a drop-down so if you wish to add the Work Request number you enter it manually.
- Click Save to save the record
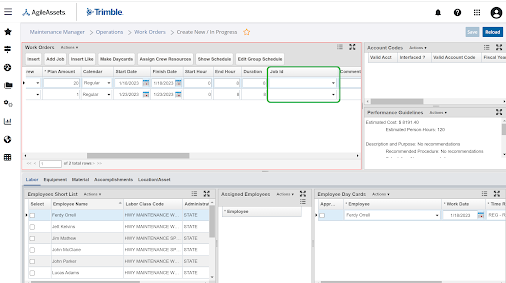
Setup a Job in the Work Orders window
Jobs can also be quickly created through the Work Orders window by following the steps below:
- Click Operations
- Select Work Orders
- Select Create New / In Progress
- Click Add Job
- Populate fields in the pop-up as in the instructions above
- The job is available to use on a work order immediately
Assign a Job to a Work Order
The Work Order you wish to assign the Job to needs to be created before the job can be assigned.
Create Work Order
For information on creating Work Orders, see this topic: Create a New Work Order
Assign Job to Work Order
Once you've created the work order or to assign a job to an existing work order, follow these steps:
- Click Operations
- Select Work Orders
- Select Create New / In Progress
- In the row of the correct work order, select the job from the Job ID drop-down list
- Click Save