...
| Table of Contents |
|---|
General Scenario Setup
...
The objective of this lesson is for the participant to understand how to create and run a multi-constraint optimization network analysis. At the end of this lesson, the user should know how to setup and run a multi-constraint optimization network analysis. |
|---|
...
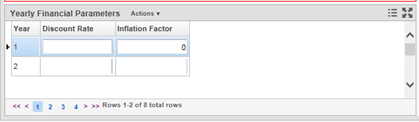
12. If you wish to use a discount rate (that is, the value of money over time) and/or inflation in the analysis, complete the records in the Yearly Financial Parameters pane at the bottom right of the window. Rates are specified in decimal form in this window and can be assigned to all years, or specific years.
...
Specify Scenario Objective and Constraints
The objective of this lesson is for the participant to understand how to enter objectives and constraints in the Constraints pane. At the end of this lesson, the user should know how to insert new objectives and constraints in the Constraints pane. |
|---|
...
You now need to edit each newly inserted record to reflect the appropriate constraint limit. After editing each record, you may proceed to enter additional constraints as needed.
...
Define Scenario Reporting Function
The objective of this lesson is for the participant to understand how to insert a reporting function. At the end of this lesson, the user should know how to add a new reporting function in the Optimization Analysis window |
|---|
...
5. Click in the Condition Threshold column in type in the numeric value.
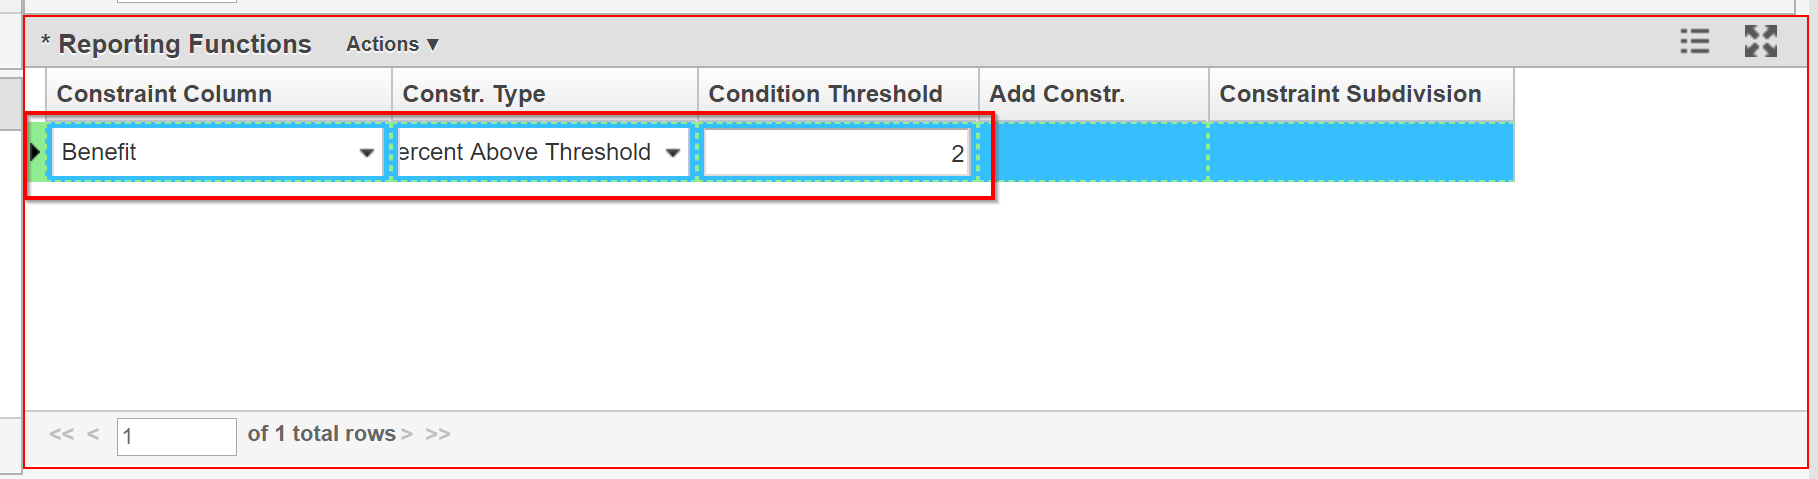
6. Click the Save button to save the record.
| Info | ||
|---|---|---|
| ||
After a scenario run, the Reports tab in the Optimization Scenario window displays the configured Reports. |
...
Include Master Work Plan Projects
The objective of this lesson is for the participant to understand how to include a project into the analysis. At the end of this lesson, the user should know how to add a project to the analysis |
|---|
...
8. Examine all Treatment Cost constraints (by Plan Year, Budget Category and Region) and see if they are equal or bigger than MWP Budget. Increase the value where needed to allow for more projects.
...
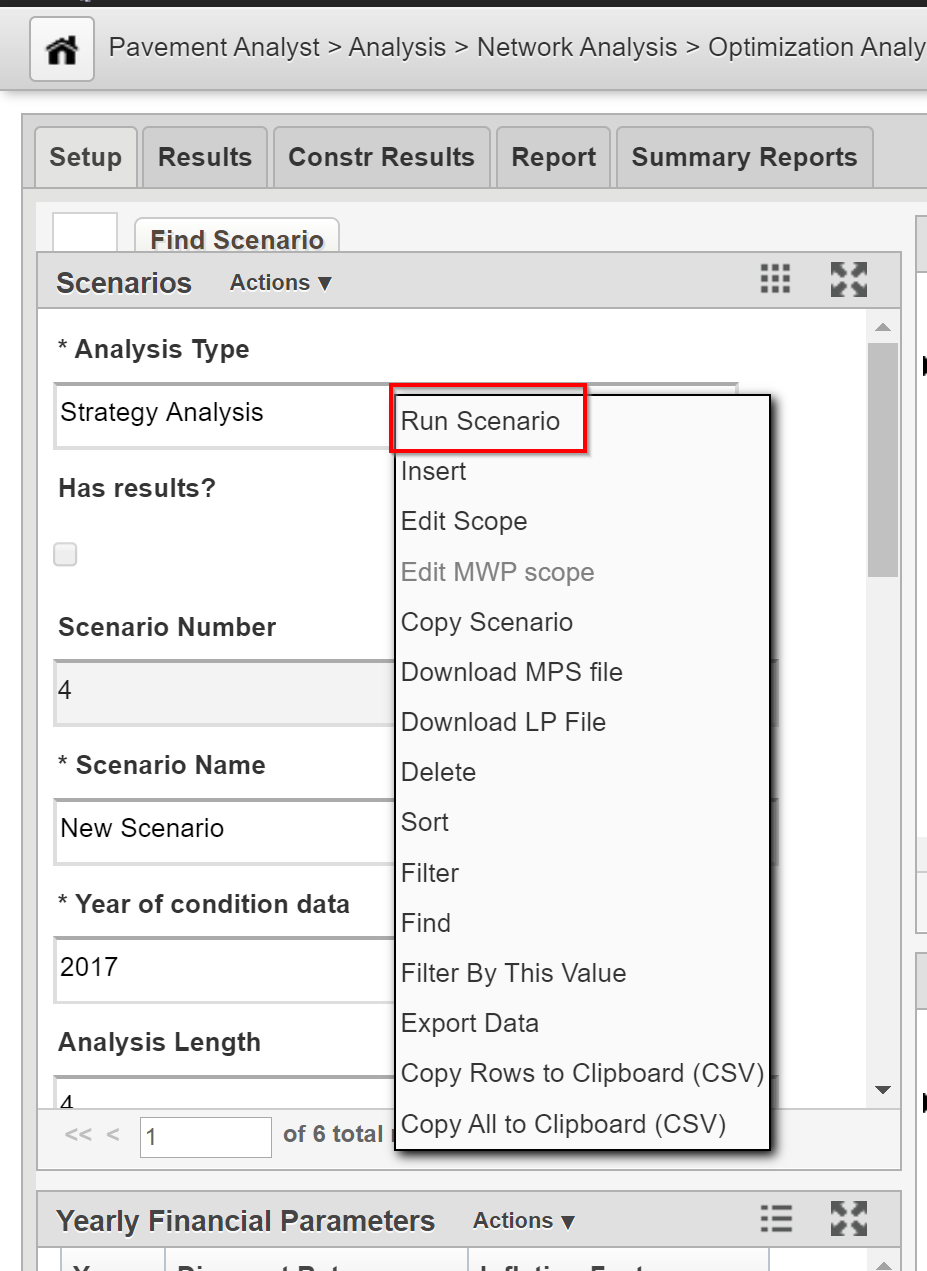
Run Analysis Scenarios
Once all constraints and reporting functions are configured, you are ready to run the optimization. Right-click in the Scenario pane and select Run Scenario. The application performs the optimization and then displays the results in the Results tab. The Constr. Results tab will also show the actual constraint values at the end of the optimization analysis. You can click the Hide button while performing other tasks. When the scenario is finished, you will receive a notification in the system.
...
Review Scenario Work Plan Results
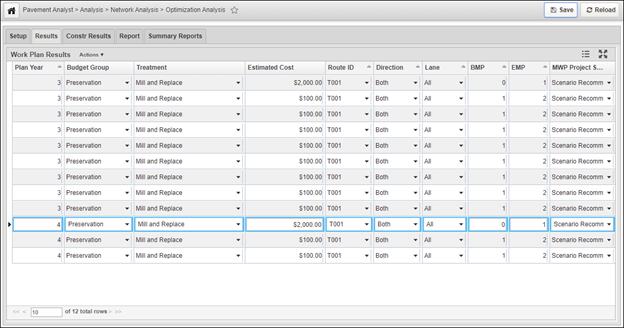
The Results tab of the Optimization Analysis window provides a list of work plans produced by the optimization routine, based upon the input criteria configured in the Setup tab. These pavement sections constitute the recommended work plan.
When you right-click this pane, the system displays a shortcut menu. This menu contains Update Cost command that can be used for re-calculating the cost for the selected record.
...
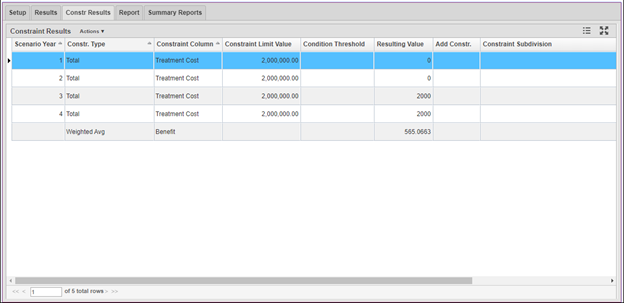
Review Scenario Constraint Results
The Constr. Results tab of the Optimization Analysis window shows the predicted values of each constraint compared to the input constraint value. This allows you to identify the constraints that have controlled the analysis results.
...
Review Report
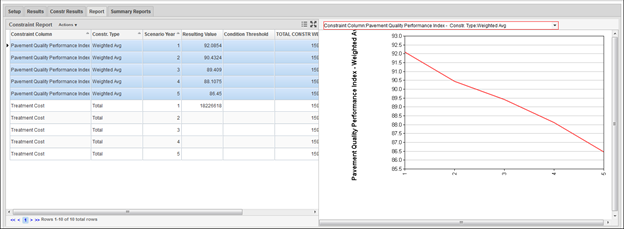
The Report tab of the Optimization Analysis window shows the constraints you selected in the Reporting Functions pane of the Setup tab and the values of the constraints.
The right pane shows a graph of the values of a particular constraint (which is selected from the drop-down list field shown at the top of the pane). The Y-axis of the graph shows constraint values and the X-axis shows the number of years in the analysis. The graph is a line graph for all constraint types except Total, which is a bar graph. You may modify the appearance of the graph by using the right-click Change Graph Properties commands.
...
Review Summary Report
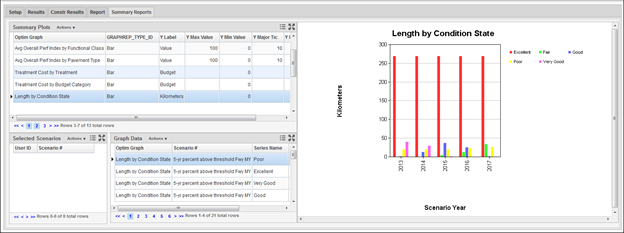
Summary Report window displays the summary graphs of each analysis scenario. These graphs are defined in “Setup Graphs for Summary Report” window and will be the same across all analysis scenarios. The x-axis of each graph is the scenario year, whereas y-axis is defined by an SQL expression. Multiple series can be defined for each graph for comparison purpose among different series. For example, a “Length by Condition State” summary report will display the lane-miles of each condition state for each year, where the scenario year is displayed as the x-axis, the total lane-miles is displayed as the y-axis, and Condition State is displayed as different Series. All these parameters can be configured “Setup Graphs for Summary Report” window.
The left top pane shows each type of summary report, the left bottom pane shows the summary data by each series and scenario year, and the right pane displays the summary graph. You may modify the appearance of the graph by using the right-click Change Graph Properties command.
...
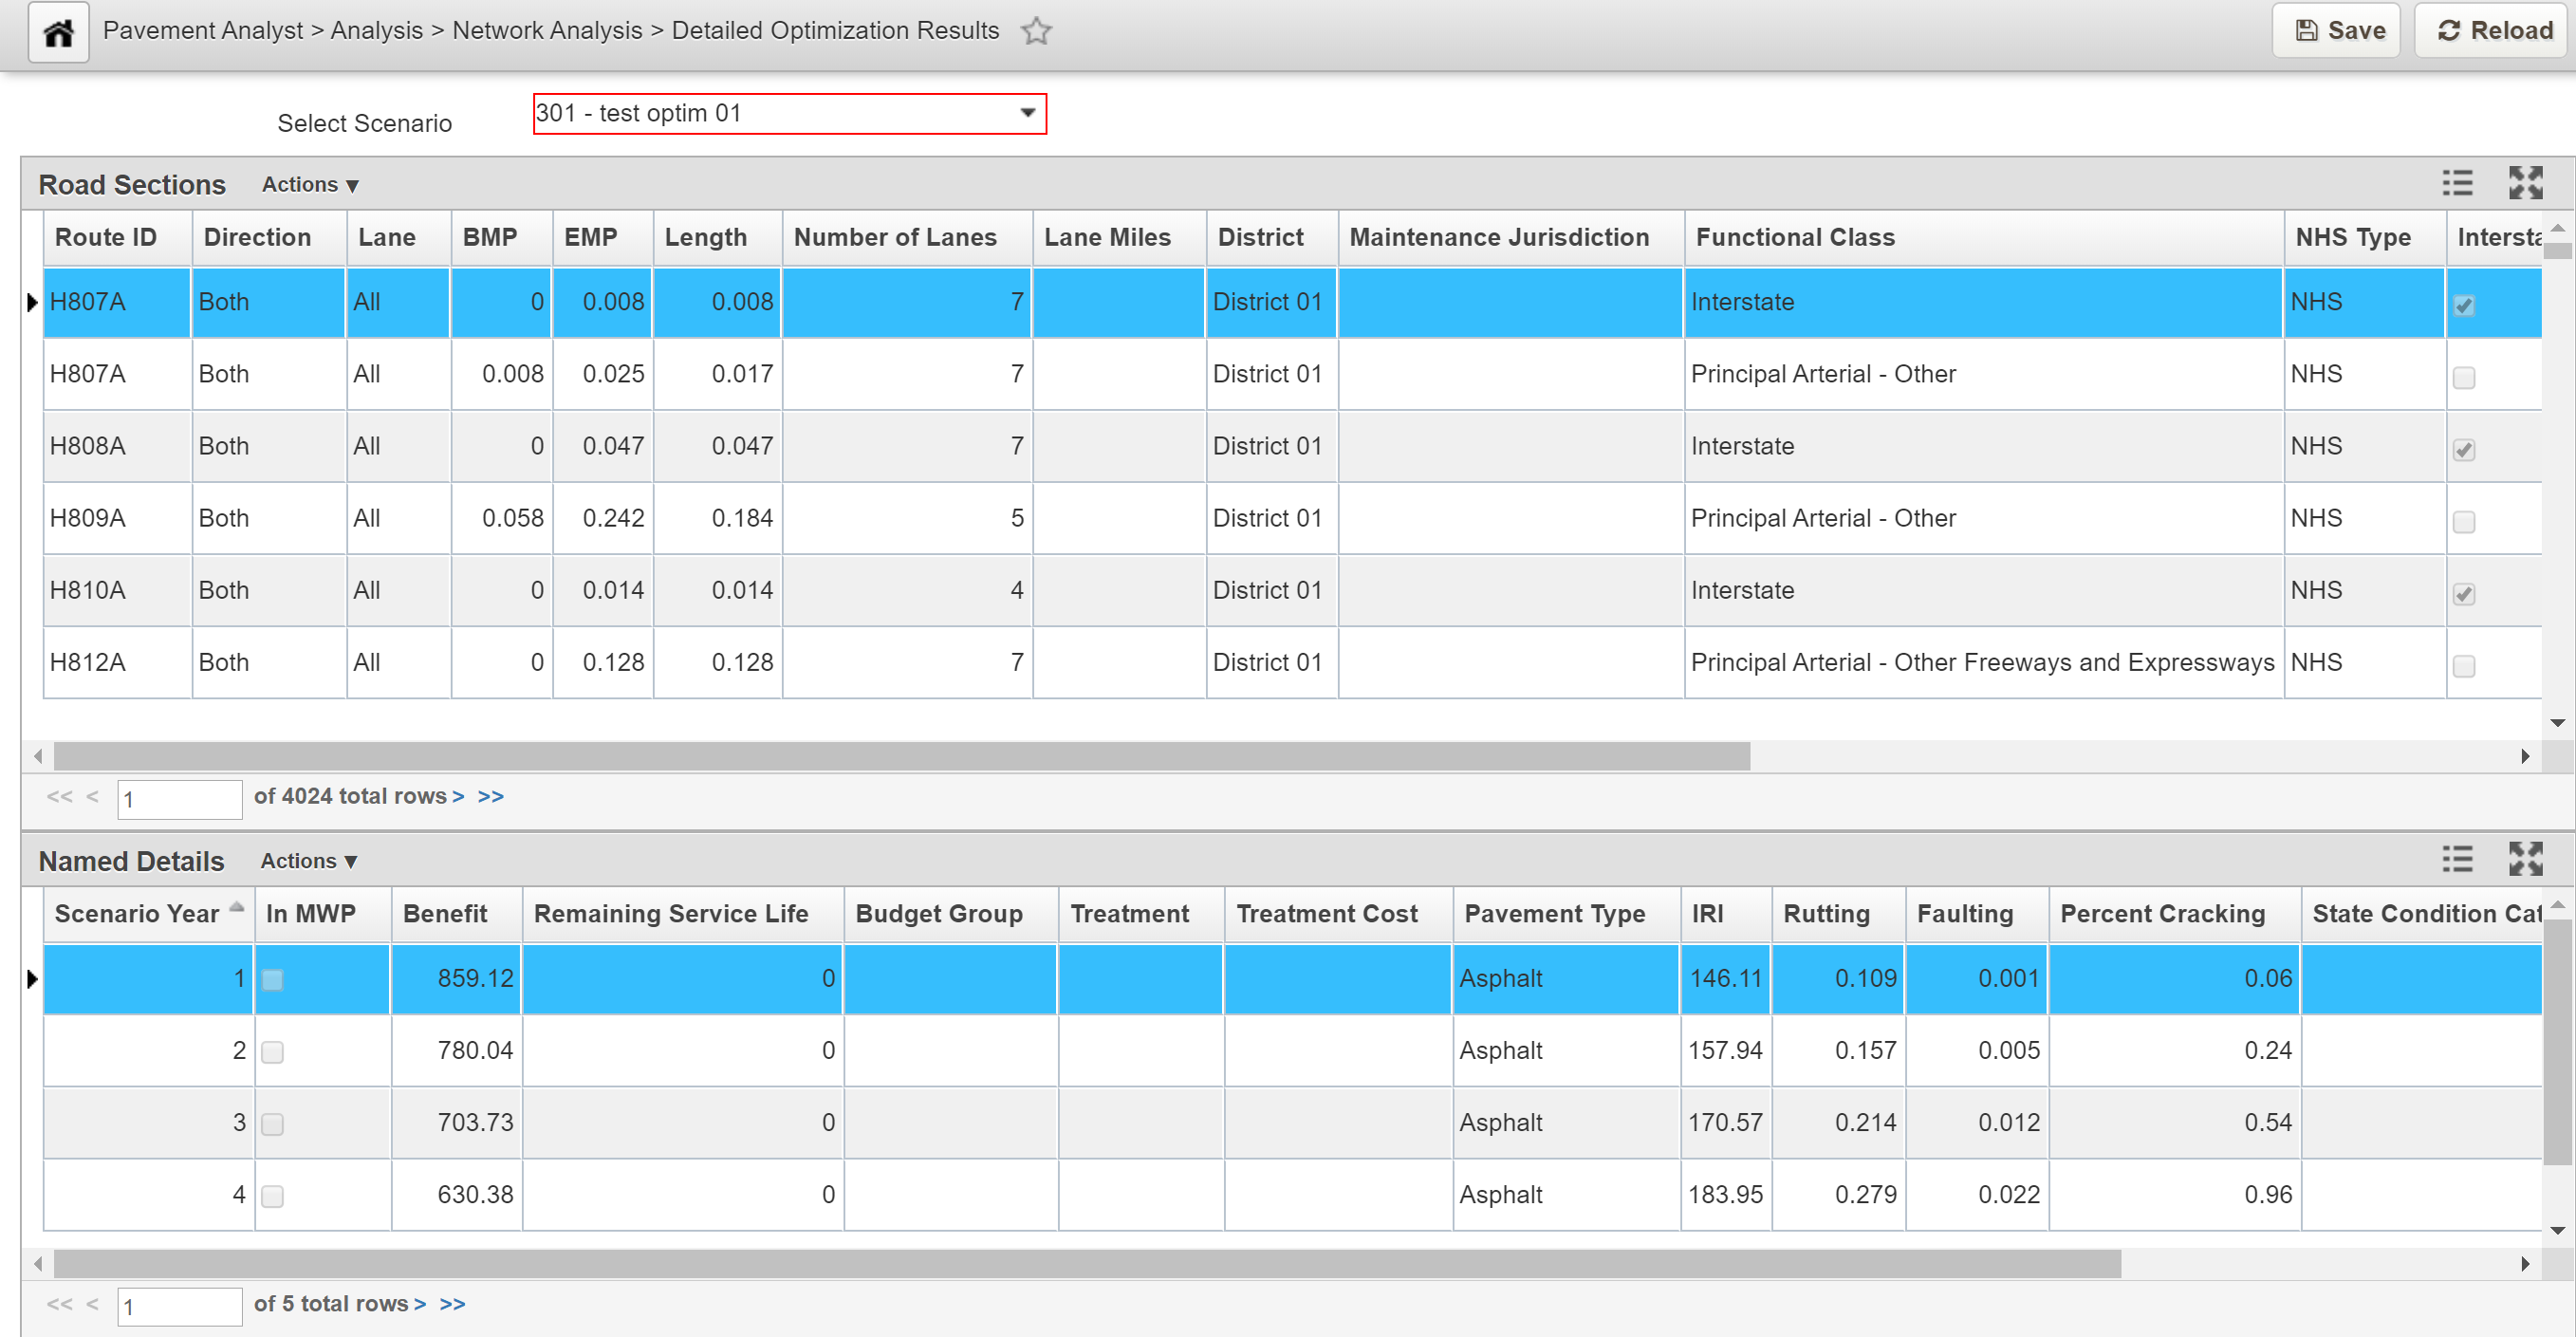
Detailed Analysis Results
For all analysis scenarios that have the Save Details check box in the Setup tab checked, the Detailed Optimization Results window (s) provides an in-depth look at the data resulting from the optimization. The user can select a desired scenario from the drop-down list in the Select Scenario field at the top of the window, and then the system displays the details data from the scenario.
The upper pane (Road Sections) shows the Network Master sections as defined in the Analysis Scope of the analysis. For the road section selected in the upper pane, the bottom pane (Named Details) shows each year's results for the road section.