...
Once a table is activated for staged editing, the system creates a copy of the source table. Then, all changes made to data in the source table are stored in the copy until approved. When the edits are approved, the changes from the Staged Editing table copy are merged with to the main record source table and then the Staged Editing record in the copy is deleted.
The setup of the Staged Editing is handled by allows via a Groovy Script configured menu item. This means it is possible to regulate which users can access this to configure which users or roles are able to access the menu item to accept or reject edits performed on staged editing enabled windows.
| Noteinfo |
|---|
Note: Do not disable Staged Editing after it has been enabled. This can cause the loss of any changes that have not yet been approved. |
...
To enable staged editing for a table, follow the steps below:
- In the Tables window, open the record for the table.
- Select the check box for Supports Staged Editing. In this example, we are using the Section Inventory table.

Right-click on the record for the table and select Apply Changes.
The system will open the Confirm dialog box which will display the DDL script to be run to create the new Staged Editing table.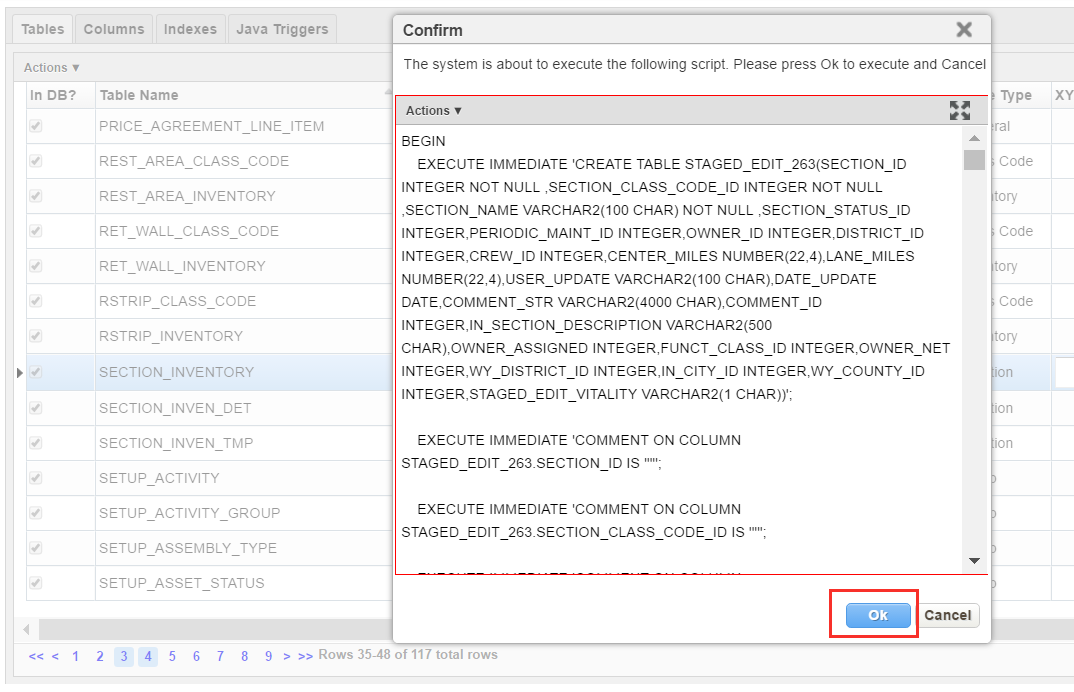
- Select OK to create the new Staged Editing table.
- Open the window that displays data from the table for which you enabled Staged Editing.
- Activate Design Mode.
- Right-click the window and select Change Control Properties. The system displays the User Control Properties dialog box.
- In the left pane of the User Control Properties dialog box, select the top node of the hierarchy. The system displays the Window Properties tab in the right pane. For more information, see Window Object Type.
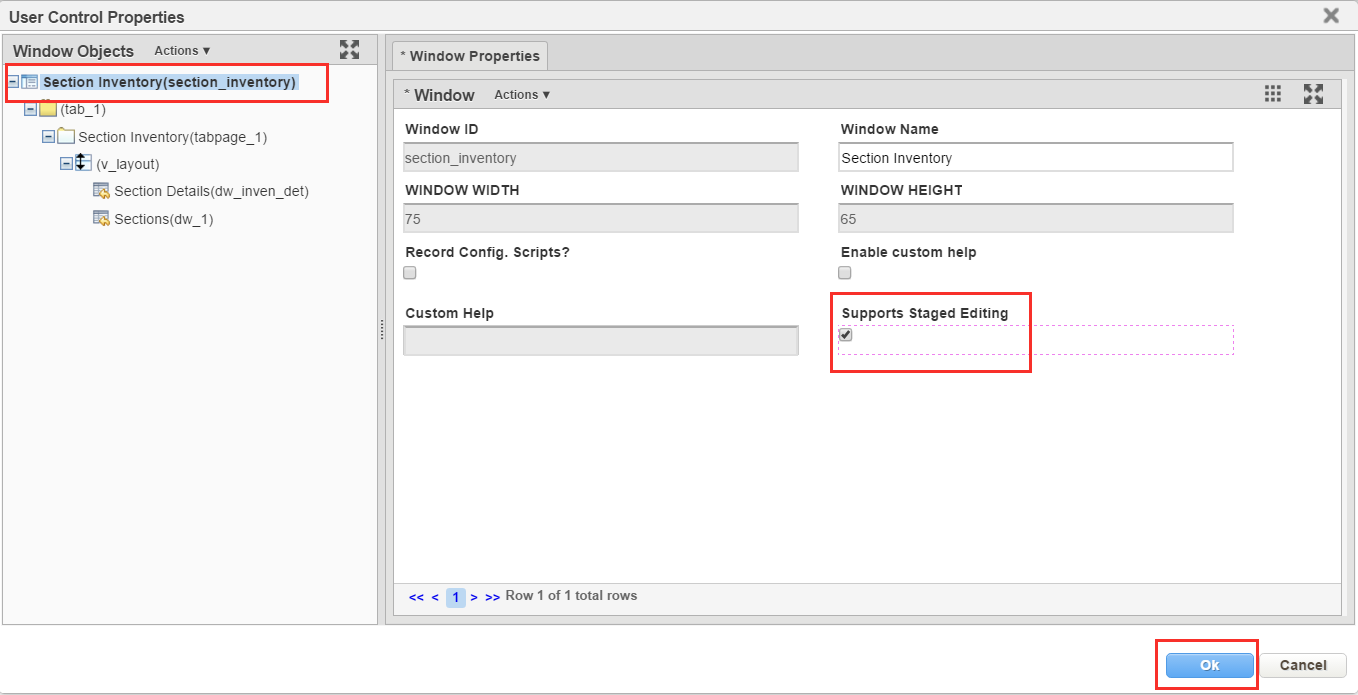
- In the Window Properties tab, click the check box in the Supports Staged Editing field. The system places a check mark in the check box to denote that it is selected.
- Close the User Control Properties dialog box by clicking the OK button.
- Exit Design Mode by selecting the Settings menu to display the Design Mode switch and then click the switch to off. Staged editing is now enabled for the table and its corresponding window.
Now, when a record is edited in this table, the edits will be displayed with a purple highlight showing the changes are not yet approved.Anchor highlight_record highlight_record 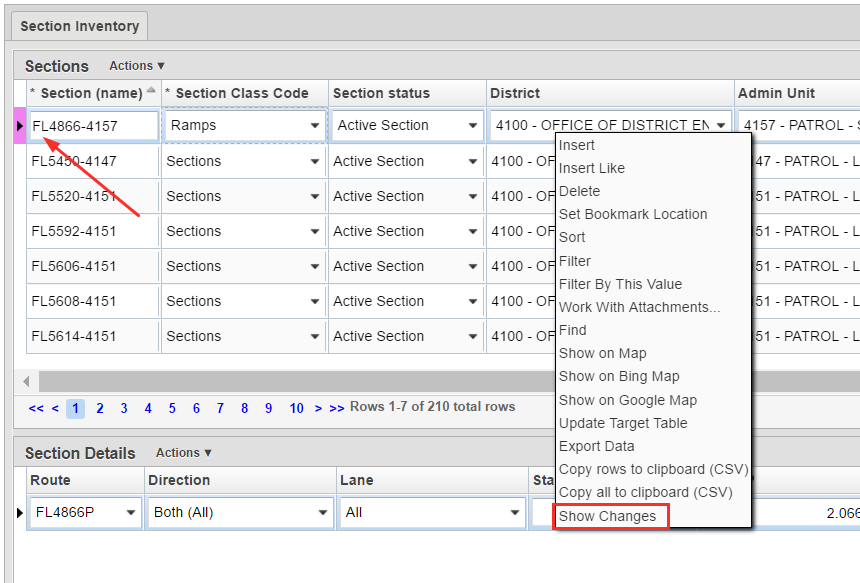
- Right-click on the highlighted row and select Show Changes. The system will open a Changes dialog box that shows the original data (top pane) and current data (bottom pane).

...