Overview of Adjusting Window Layouts Graphically
When Update Window Using Design Mode, changes to positions and sizes of window components are applied system-wide and will therefore be changed for all users. Individual objects and panes within a window can be adjusted to two ways: you can either resize a pane graphically using drag and drop, or directly edit the size and position properties in the Configure Window Objects dialog.
Resize an Object
Activate Design Mode, then adjust the size of an object (for example a tree view or grid pane) by hovering over the edge of the object that you wish to resize until the cursor changes to opposite-pointing arrows. You can then drag the edge or corner to the desired position.
An alternate method of doing this is to directly edit the size and position properties in the Configure Window Objects dialog.
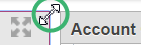
Resize a Column
A user can temporarily adjust the the width of a column in a grid pane at any time by dragging the edge of the column to the left or right.
However, if Design Mode is activated, you can adjust the default width of a column for all users by hovering over the edge of the column that you wish to move until the cursor changes to opposite-pointing arrows. You can then drag the edge to the desired position. The new size is saved when you close the window. All users will then see this new column size when they open the window.

Add a Column to a Pane
To add a column to a pane, follow these steps:
- Activate Design Mode.
- Right-click the pane, and then select Change Control Properties from the shortcut menu. The User Control Properties dialog box is displayed.
- Select the Data Window tab.
- In the Columns pane, right-click and then select Select Columns from the shortcut menu. A dialog box opens where you can select the columns to appear in the form.
- In the dialog box, select the column that you want in the pane. Select a column by locating it in the hierarchy, right-clicking the node, and then selecting Select This.
- Select OK to close the dialog box and display the selected column in the Columns pane.
- In the Columns pane, set the Order, Required, and Editable fields as necessary. If needed, complete the remaining fields for the column. Then, select OK to close the User Control Properties dialog box.
- Select the
 icon.
icon. - Select OK to save the new layout.
- Exit Design Mode by selecting the Settings menu and changing the Design Mode switch to off.
Delete or Hide a Column from a Pane
To delete a column from a pane, follow these steps:
- Activate Design Mode.
- Open the window that contains the column.
- Right-click the pane, and then select Change Control Properties from the shortcut menu. The User Control Properties dialog box is displayed.
- Select the Data Window tab.
In the Columns pane, locate the column to be removed. Right-click the record showing the column and then select Delete from the shortcut menu. The record for the column is removed from the pane.
Note: Instead of deleting the column, you can also hide the column by selecting the Hidden check box.- Select OK to close the User Control Properties dialog box.
- Select the icon.
- Select OK to save the new layout.
- Exit Design Mode by selecting the Settings menu and changing the Design Mode switch to off.
Allow End Users to Show and Hide Columns
You can activate the ability for end users customize the display of columns for their view by using the following steps:
- Display the User Control Properties dialog box by selecting the Design Mode check box, right-clicking the window, and then selecting Change Control Properties.
- In the left pane of the dialog box, select the pane for which you wish to customize the display of columns.
- Select the Data Window tab.
- In the Form pane of the Data Window tab, locate the Columns Hideable check box and then select it. The system places a check mark in the selection box to indicate that it is selected.
Select OK. The system saves the changes and closes the User Control Properties dialog box. The right-click action to Show/Hide Columns will now be available for end users (subject to security settings).
Note: Columns that are deleted or hidden from a pane for all users will still not be available for end users when Columns Hideable is activated.
Change the Format of a Pane
The format for a pane is controlled by a CSS file. The format for the pane can be changed by applying a new or modified CSS file as described below:
- Activate Design Mode.
- Open the window that contains the pane. If necessary, place the window in record view by selecting the
 icon in the title bar.
 - Right-click the window and select Change Control Properties from the shortcut menu. The User Control Properties dialog box is displayed.
- In the General Properties tab, select the Get CSS button and save the CSS file in a convenient location on your computer.
- Using third-party software, edit the CSS file to reflect the desired formatting.
- In the General Properties tab, select Put CSS and select the edited CSS file from your computer. The application applies the retrieved CSS file to the window.
- Select the icon.
- Select OK to save the new layout.
- Exit Design Mode by selecting the Settings menu and changing the Design Mode switch to off.
Note: The edited CSS file does not cause the original CSS file to be deleted; rather, it "overlays" the original. This allows you to use the Delete CSS button in the User Control Properties dialog box to restore the original formatting as set by the original CSS file.