Features of Design Mode
Design mode allows authorized users to adjust the properties of each object in a screen. For instance you can:
- Adjust Window Layouts
- Configure Window (Screen) Objects
- Change the properties of a window
- Adjust the position of object such as Buttons in the window
- Adjust the height and width of panes
- Adjust the width of columns in grids
- Add or remove columns in grids
- Filter the items in drop down lists
- Set up business rules that are triggered by editing a field or saving data
- Change properties of the fields in a grid or form such as whether a field in a grid is required or not
- Modify the format applied to a form in a CSS file
Note: All changes to properties of window component objects are applied system-wide and will therefore be applied to all users.
Activating Design Mode
To activate Design Mode, you must be a user with design privileges. This designation is made in the User Names and Access window by selecting the Is Admin? check box for the user's record. Once you have design privileges, follow these steps to activate Design Mode:
- Log on to the application.
- Open the window to be adjusted.
- Open the Settings menu.
- Click the Design Mode switch at the top of the menu. The system changes the switch to show that Design Mode is active.


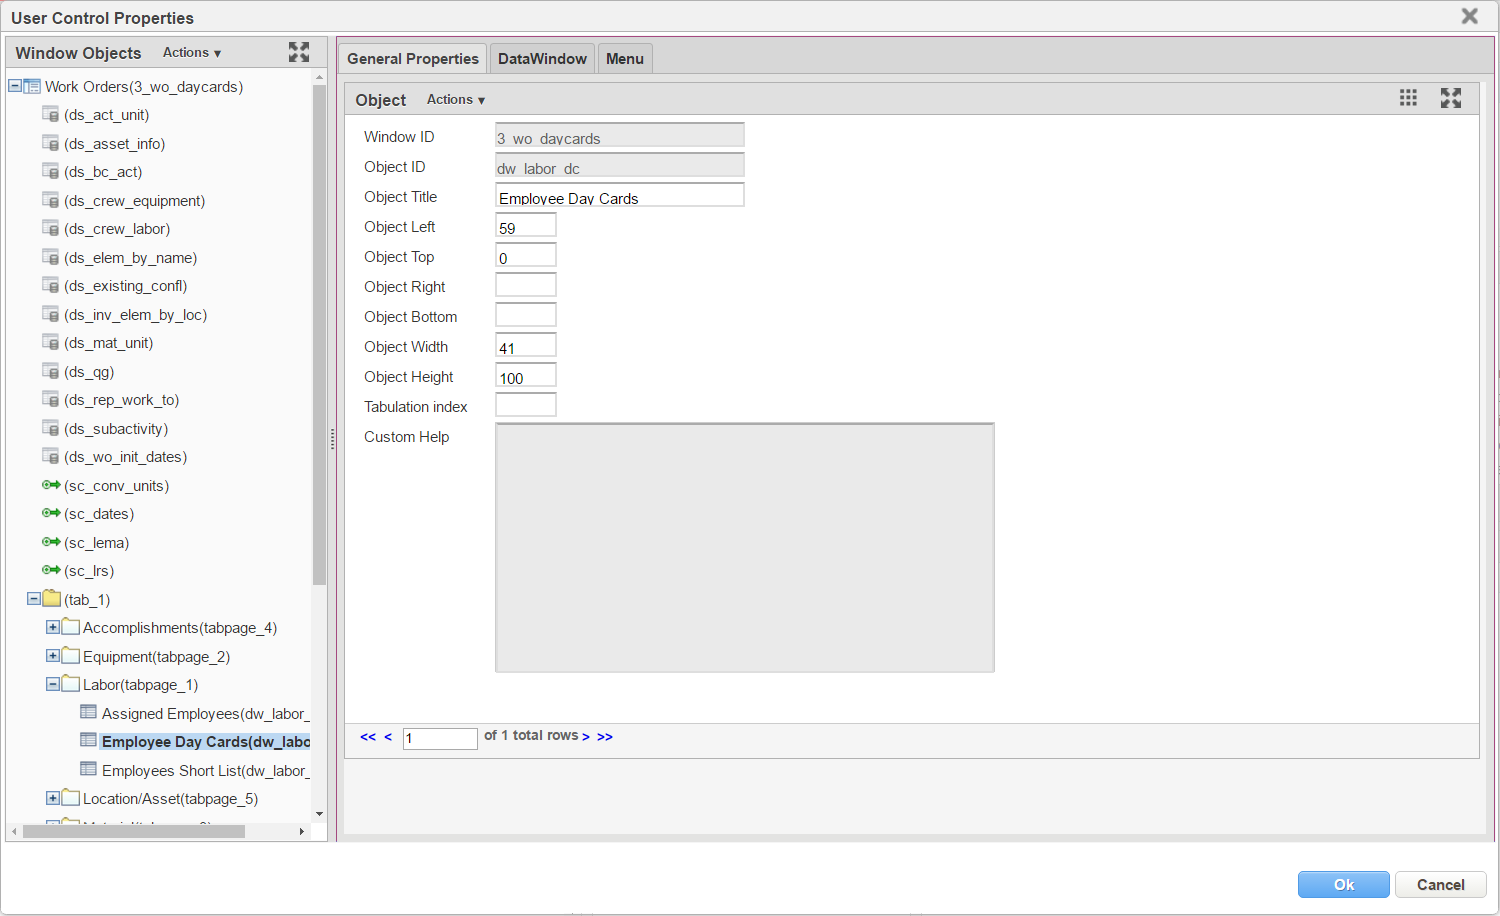
- Right-click on the window object you want to adjust (for example, click in a grid pane) and select Change Control Properties. This displays the User Control Properties dialog box. This dialog box lists all objects in the window along the left side of the dialog box. Depending on what object is selected in this list, different tabs (and fields within the tab) are displayed. The entire set of available tabs are General Properties, Data Window, and Menu. These tabs are described in more detail in the following sections. The object is selected on the left. The properties for the selected object are shown on the right grouped into tabs. The properties depend on the object type selected.
- To change the configuration of each object, see Configure Window Objects page.
The dialog box also provides the following command buttons:
- OK — This command applies any changes you made and then closes the dialog box
Cancel — This command discards any changes you made, reverts to the previous (saved) version, and closes the dialog box.
NOTE: Even though changes are applied to the window, they are not yet permanently saved until you attempt to close the window. The application then asks if you wish to save the changes — and responding by clicking OK permanently saves the changes.
- When you are finished making the modifications, click the Design Mode switch at the top of the menu to set it to Off. Alternately, opening a different window cancels Design Mode.