This topic describes the user interface found in an AgileAssets application. A typical window is shown, with the numbered items described below.
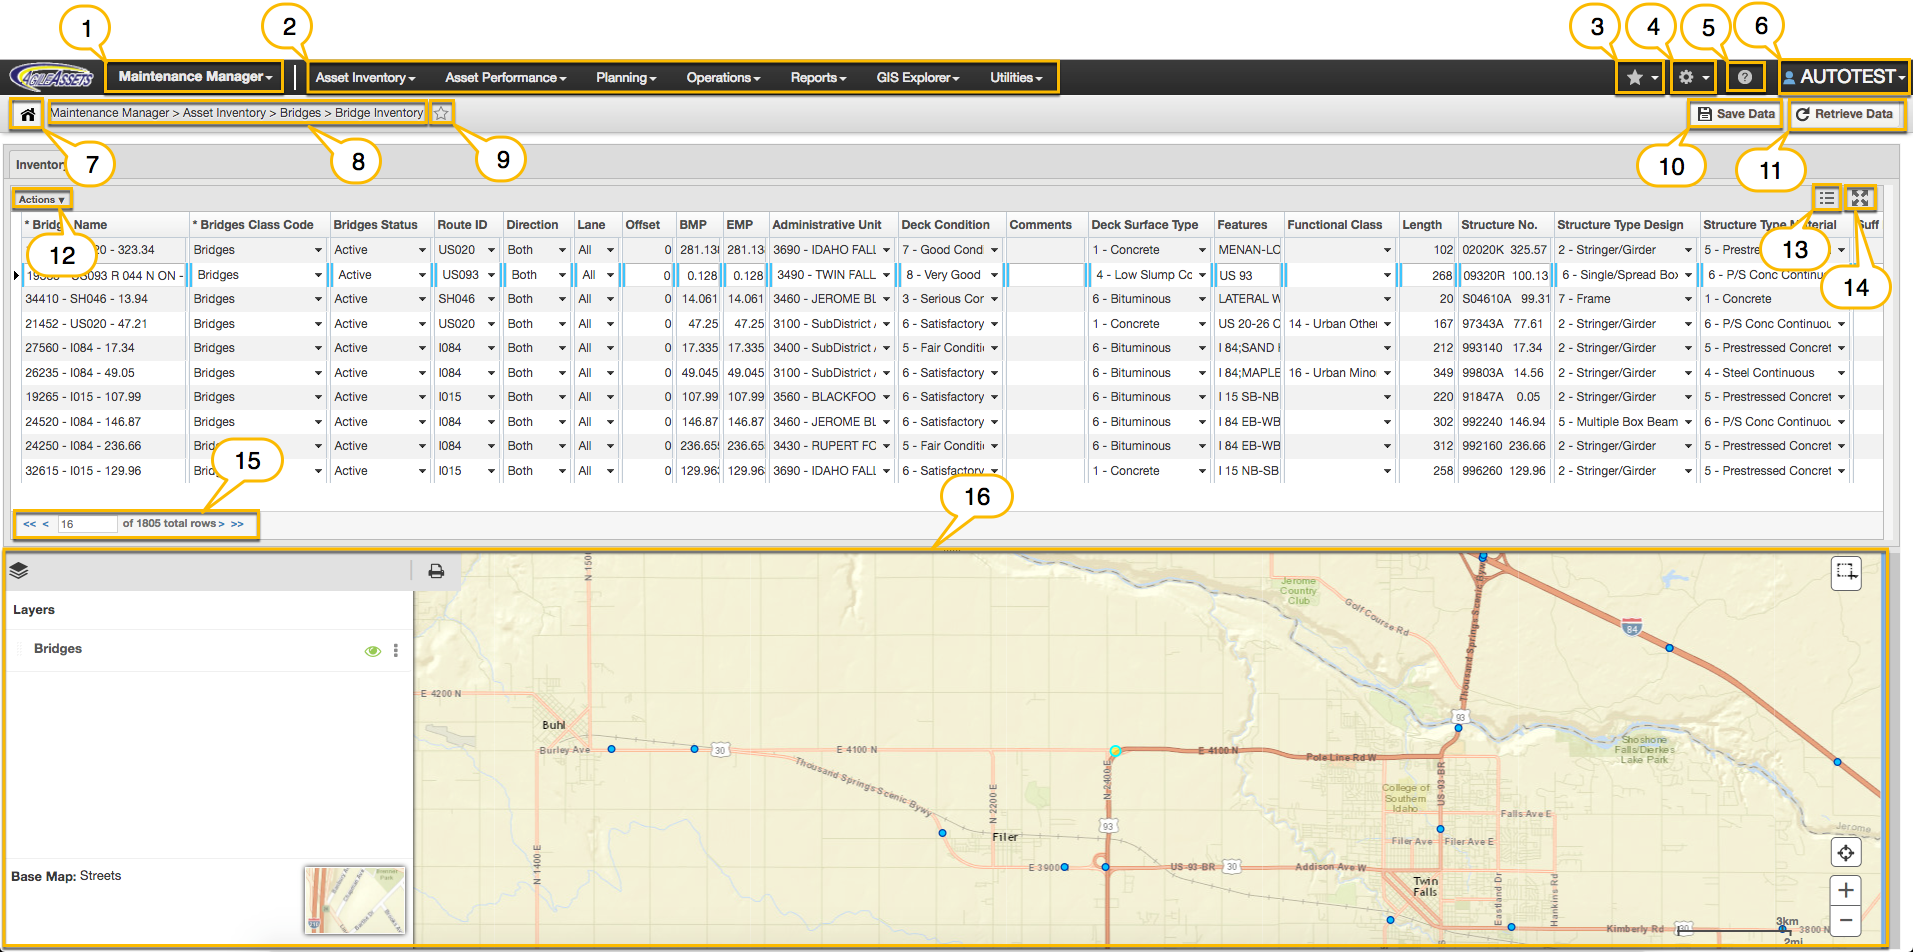
- Module Name: The top left shows the name of the currently selected AgileAssets module. To select a different module, select the down-pointing arrow
 next to the module's name to display the list of available modules and then select the desired module.
 - Menu Headers for Selected Module: The area below the selected module and version information shows the menu headers for the selected module. When you select the menu header or the down pointing arrow, the system displays the menu items. You may then select these menu items to display a window.
Settings Menu: Open the Settings Menu by selecting Settings or the down-pointing arrow beside the name.
- Help Documentation: This icon opens Help information for the current window.
User Menu: Select your user name in the upper right corner to open the 6. User Menu.
Home Icon: The Home icon
 displays the Home window of the current module, which is typically its dashboard.
Quick Links Indicator: Select the
 icon at the end of the windows navigation path to create a Quick Link to the displayed window. If the icon is filled
  , a Quick Link already exists and you can remove it by deselecting the icon.
 - Save Data: The Save Data button stores any new data that you entered in the window to the database. When a window has new, unsaved data a dashed rectangle is shown around the cell(s) containing the unsaved data and the Save Data button is colored green.
- Retrieve Data: This retrieves the latest data from the database for the displayed window. If unsaved data exists in the window, you will see a warning message that the data will be lost if you proceed with the Retrieve operation. You can either select OK to save the unsaved data or select Cancel to discard the unsaved data. Then the latest data will be retrieved from the database.
Actions: Each window or pane has specific actions that can be performed on records in the pane. These commands are found in a menu called the Actions shortcut menu. Open this menu by either right-clicking the pane (that is, clicking the right mouse key when the cursor is in the pane) or by selecting
 in the title bar.
Free Form View or Grid View: Select whether the window or pane shows a single record at a time (Free Form View) or multiple records (Grid View). When the icon appears like this
 , select it to display one record at a time. The system then changes the icon to be
  . Select the icon again to return to displaying multiple records in the window or pane.
- Maximize or Minimize a Pane: Use the
 icon to maximize the size of the pane. The pane re-sizes to fill the entire browser window (obscuring other panes if necessary). The icon also changes to
  to indicate that selecting the icon again will restore the pane to its original size. You can also maximize or minimize a pane by double-clicking the title bar. Double-click the title bar with your mouse to expand the pane to fill the browser window, and double-clicking the title bar again to reduce the pane to its original size.
 - Record Navigation: The lower left corner of each pane or window shows the number of records in the window or pane. Use the following controls to navigate to different records:
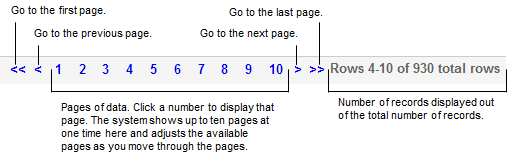
- Pane: Each window is made up of a set of panes. This pane is displaying GIS (Geographic Info System) Explorer.